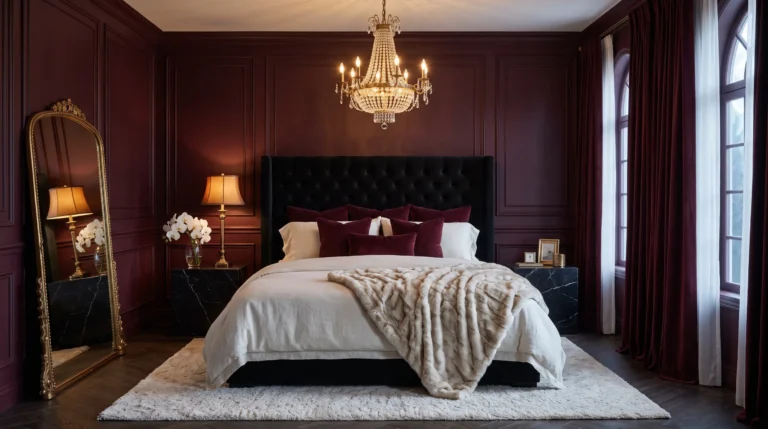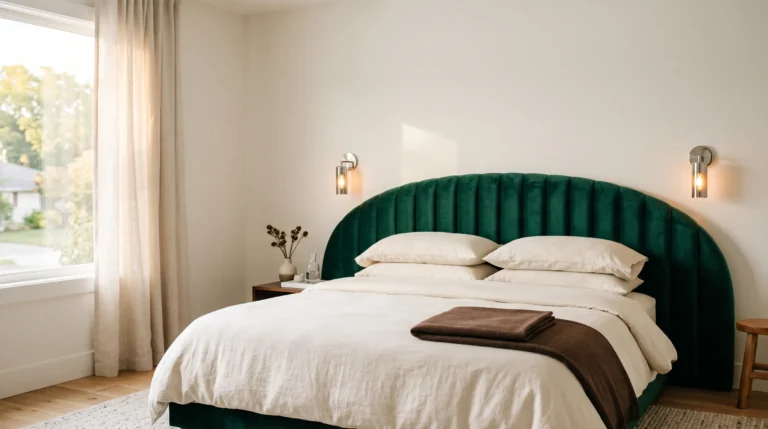
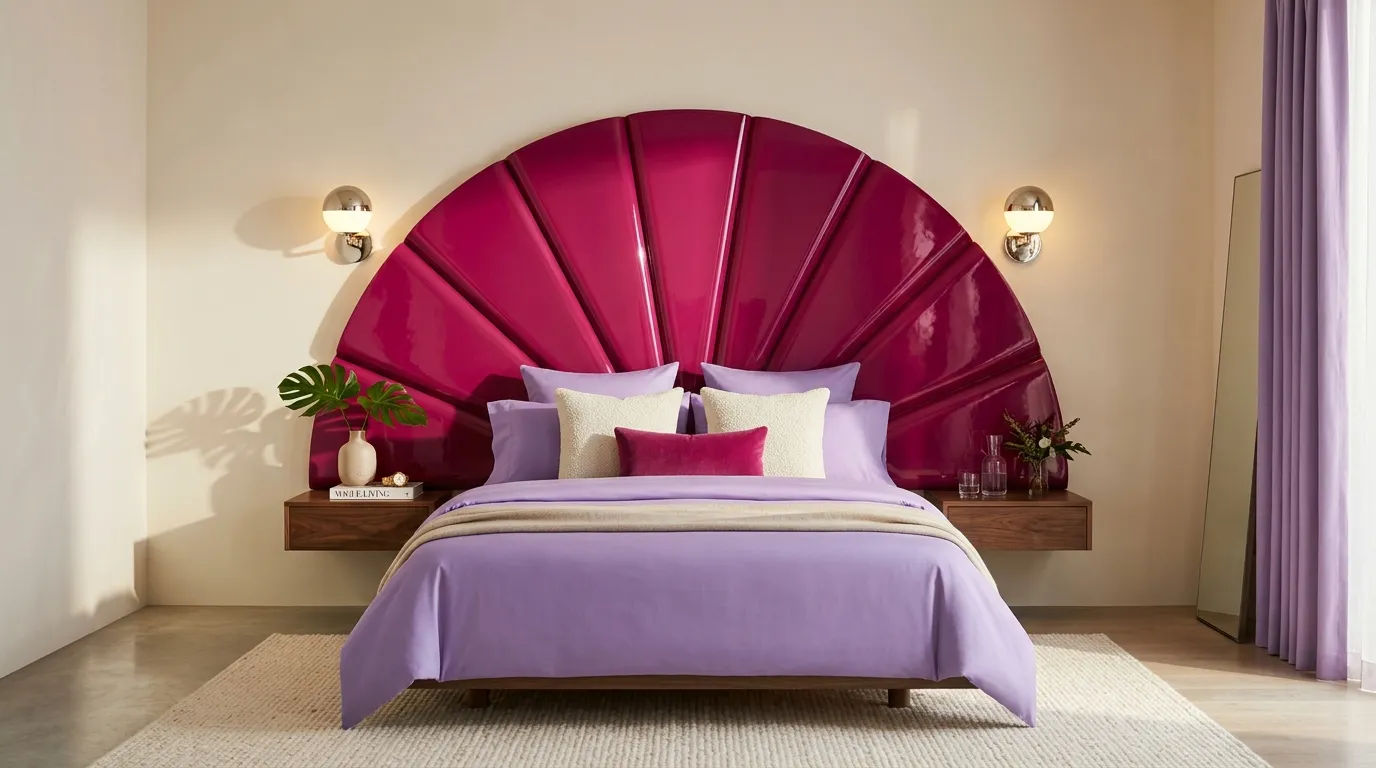
24 DIY Headboard Ideas You Can Actually Build Today
The best reason to build a headboard is not saving money; it is getting the exact width, height, and shape your bedroom needs. A comparable upholstered or wood headboard often retails for $300–$800+, while many DIY versions use $50–$150 in materials. That difference matters because mass-produced headboards are usually sized around standard mattress widths rather than the actual wall space available. My husband, who works in home construction, has reminded me more than once that proportions and anchoring matter as much as the pretty finish. A homemade headboard lets you solve both at once, and these projects show exactly how. DIY headboard ideas give you control over the size, shape, finish, and mounting method.
You can build a custom headboard for roughly $50–$150 in materials while controlling its exact width, height, silhouette, and mounting method.
This collection focuses on real headboards you can build, mount, and style—not decorative substitutes behind the bed. You will find projects ranging from beginner-friendly plywood construction to more involved joinery, with dimensions, tools, mounting methods, costs, and realistic timelines included. I deliberately varied the materials and silhouettes so the finished rooms do not all look like versions of the same project. Several builds also borrow practical construction habits I have learned from watching my husband work: locate studs before mounting, account for weight, and never treat hardware as an afterthought. The goal is simple: build something beautiful that stays secure.
1. Scalloped Linen Headboard
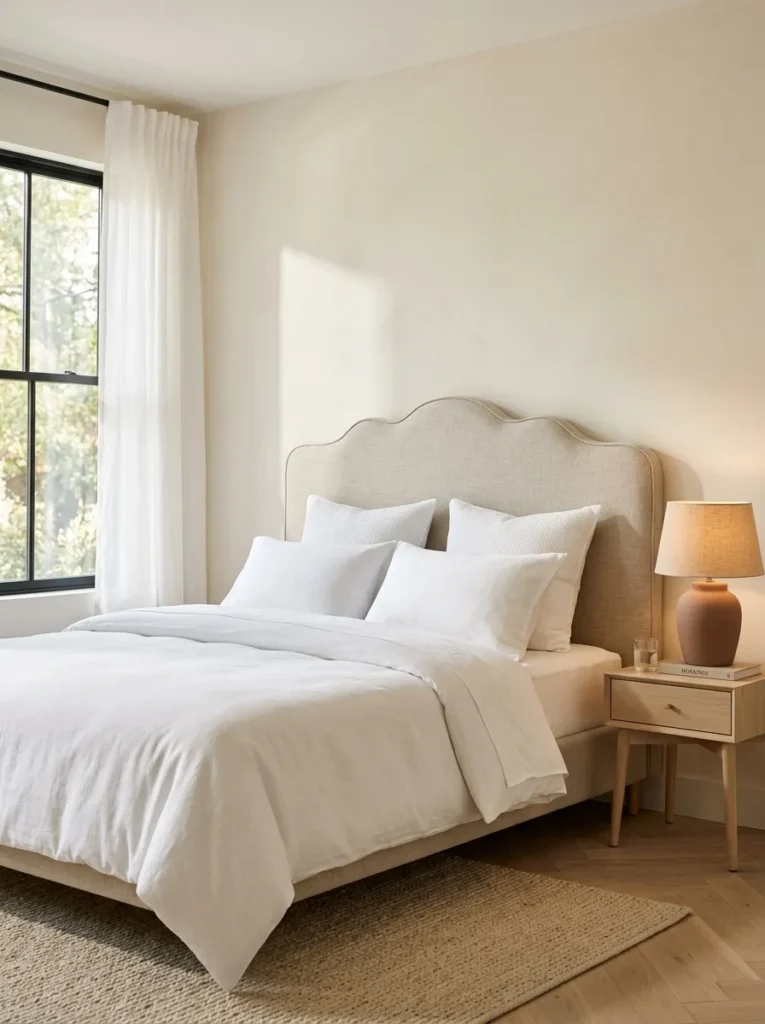
- Materials: ½-inch plywood, 2-inch high-density upholstery foam, cotton batting, oatmeal linen fabric, hardwood for a French cleat.
- Dimensions: 72 inches wide × 42 inches high for a queen bed; use 84 inches wide for a broader wall-spanning look.
- Build: Trace a 12-inch scallop template, cut the top edge with a jigsaw, sand smooth, then layer foam, batting, and linen over the panel.
- Tools: Jigsaw, drill, sanding block, staple gun, measuring tape, cardboard template.
- Mounting: Wall-mounted with a French cleat secured into wall studs using 3-inch structural screws.
- Cost/Time: Approximately $110–$145 and four to six hours.
- Skill level: Beginner to intermediate.
- Styling: Pair the oatmeal upholstery with crisp white bedding and one oversized ceramic lamp in a muted terracotta finish.
Why this works: A simple scalloped profile makes inexpensive upholstery look deliberately architectural.
A scalloped silhouette can make a bedroom feel custom before you add a single decorative object. Cut a 72-by-42-inch half-inch plywood panel for a queen bed, then mark repeated 12-inch scallops along the top edge using a cardboard template. Cover the face with 2-inch high-density foam, wrap it in oatmeal linen upholstery fabric, and staple the fabric behind the panel. Use a jigsaw for the curves, drill, staple gun, and sanding block. For a clean finish, add 1-inch cotton batting over the foam before upholstery. The result has enough shape to look architectural without requiring advanced joinery.
Mount this headboard to the wall with a French cleat made from two matching hardwood strips, driving the lower strip into studs with 3-inch structural screws. A queen mattress needs 60 inches of width, so the 72-inch panel leaves 6 inches visible on each side; increase the width to 84 inches for a more generous look. Expect roughly $110–$145 for plywood, foam, batting, linen, cleat lumber, and hardware, plus four to six hours of work. My husband’s construction rule applies here: locate studs first, especially when the upholstered panel is tall enough to tempt someone to lean against it.
2. Saffron Fluting
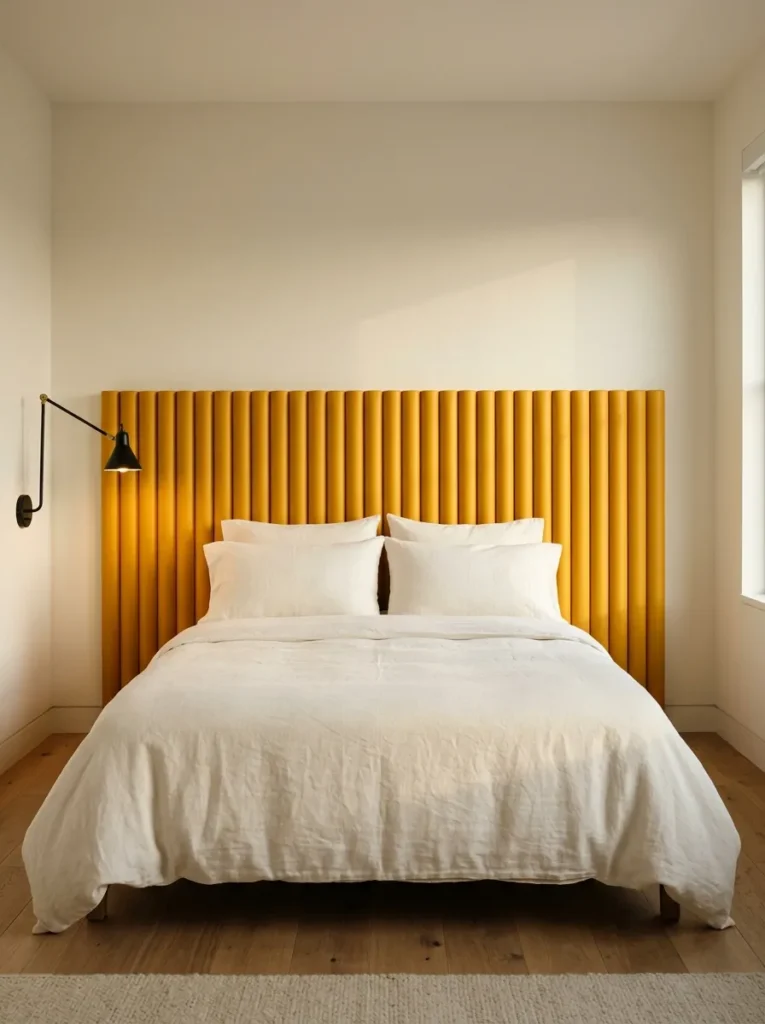
- Materials: ¾-inch MDF, 1-by-2-inch poplar strips, wood adhesive, 18-gauge brad nails, primer, satin saffron-yellow paint.
- Dimensions: 76 inches wide × 48 inches high for a queen bed.
- Build: Cut the MDF panel, prepare 48-inch poplar strips, mark equal spacing, then glue and pin-nail each strip vertically across the face.
- Tools: Miter saw, brad nailer, level, tape measure, sander; the nailer is optional.
- Mounting: French cleat mounted directly into wall studs.
- Cost/Time: Approximately $125–$165 and five to seven hours, excluding paint drying.
- Skill level: Intermediate.
- Styling: Finish with ivory bedding and one blackened-brass wall sconce positioned beside the headboard.
Why this works: Repeated vertical strips create architectural depth through spacing rather than complicated joinery.
Vertical fluting gives a headboard depth without relying on tufting, and the repeated grooves are surprisingly forgiving to build. Start with a 76-by-48-inch MDF panel for a queen bed, then cut 1-by-2-inch poplar strips to 48 inches and space them evenly across the face. Glue and pin-nail each strip, keeping a scrap spacer between pieces so the rhythm stays consistent. Sand lightly, prime, and paint the entire assembly a saturated saffron yellow in a durable satin finish. You will need a miter saw, brad nailer, level, measuring tape, and sander; the nailer is optional but makes alignment faster.
A French cleat is the safest mounting choice for this wall-mounted build because the MDF and solid-wood strips create substantial weight. Budget $125–$165 for MDF, poplar, paint, primer, adhesive, nails, and mounting hardware, with five to seven hours including drying time. Keep the lower edge about 2 inches above the mattress so bedding can tuck neatly underneath. For styling, pair the saffron surface with ivory bedding and a single blackened-brass reading sconce mounted beside the bed rather than drilling fixtures into the headboard itself. This construction reads custom because the spacing is precise, not because the materials are complicated.
3. Maple Cane Frame
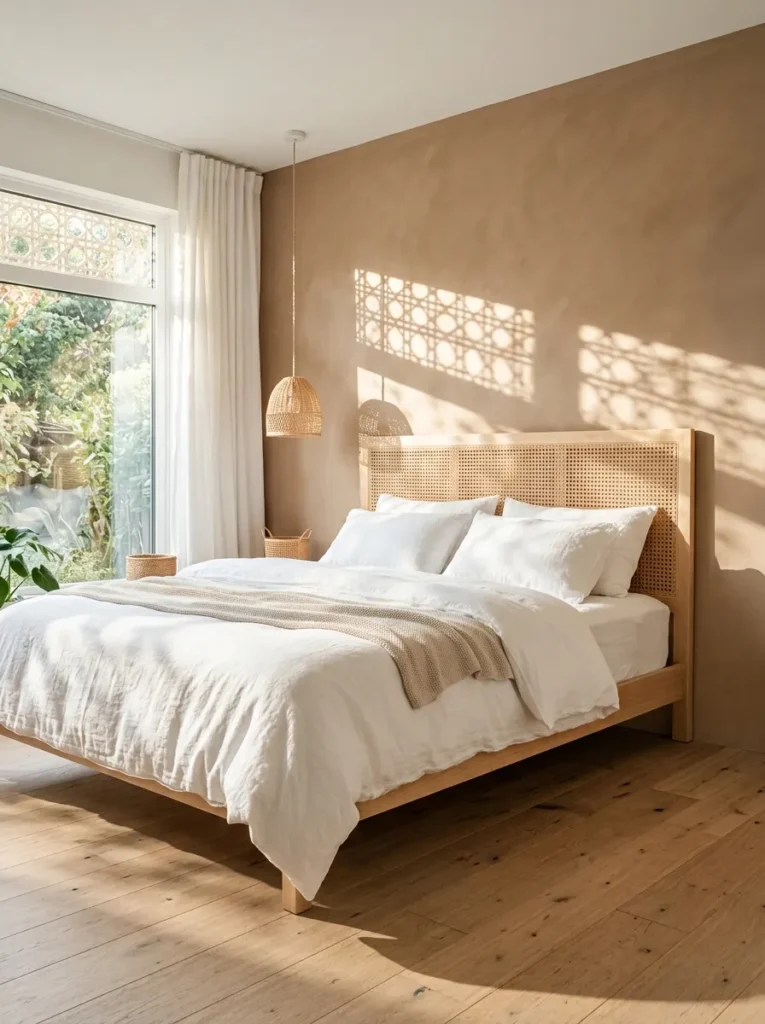
- Materials: 1-by-3-inch maple boards, natural cane webbing, wood glue, pocket screws, spline, clear matte water-based finish.
- Dimensions: 78 inches wide × 48 inches high, with a 3-inch maple perimeter around the cane opening.
- Build: Construct the rectangular maple frame, cut the central opening, route a shallow rear rabbet, then tension and secure pre-soaked cane with spline and adhesive.
- Tools: Miter saw, pocket-hole jig, router, clamps, staple gun, drill.
- Mounting: Freestanding with two 30-inch maple legs and a rear stabilizing crossbar; bolt to the bed frame where compatible.
- Cost/Time: Approximately $140–$190 and six to eight hours, plus finish drying.
- Skill level: Intermediate.
- Styling: Use a matte clay-colored wall and crisp white bedding so the cane pattern remains visually prominent.
Why this works: An oversized woven panel turns a familiar cane material into a substantial architectural headboard.
Cane webbing becomes especially striking when you stop treating it like a small furniture accent and stretch it across an oversized frame. Build a 78-by-48-inch queen headboard from 1-by-3-inch maple boards, joining the corners with pocket screws and wood glue. Create a centered opening, leaving a 3-inch perimeter, then secure pre-soaked cane webbing into a shallow rear rabbet with spline and adhesive. A pocket-hole jig, miter saw, router, clamps, and staple gun cover the basic work; the router is the optional upgrade. Finish the maple with a clear matte water-based coat so the cane remains the visual focus.
Keep this headboard freestanding by attaching two 1-by-3-inch maple legs to the back, extending 30 inches below the lower frame edge, and secure those legs to the bed frame with existing bolts if compatible. For additional stability, add a crossbar between the legs just above floor level. Materials should run about $140–$190, and plan on six to eight hours plus finish drying. Because cane has an open pattern, keep the wall behind it visually quiet: a matte clay-colored wall and crisp white bedding let the woven panel cast delicate shadows. The construction is intermediate, but the joinery remains straightforward.
4. Cobalt Arch Panel
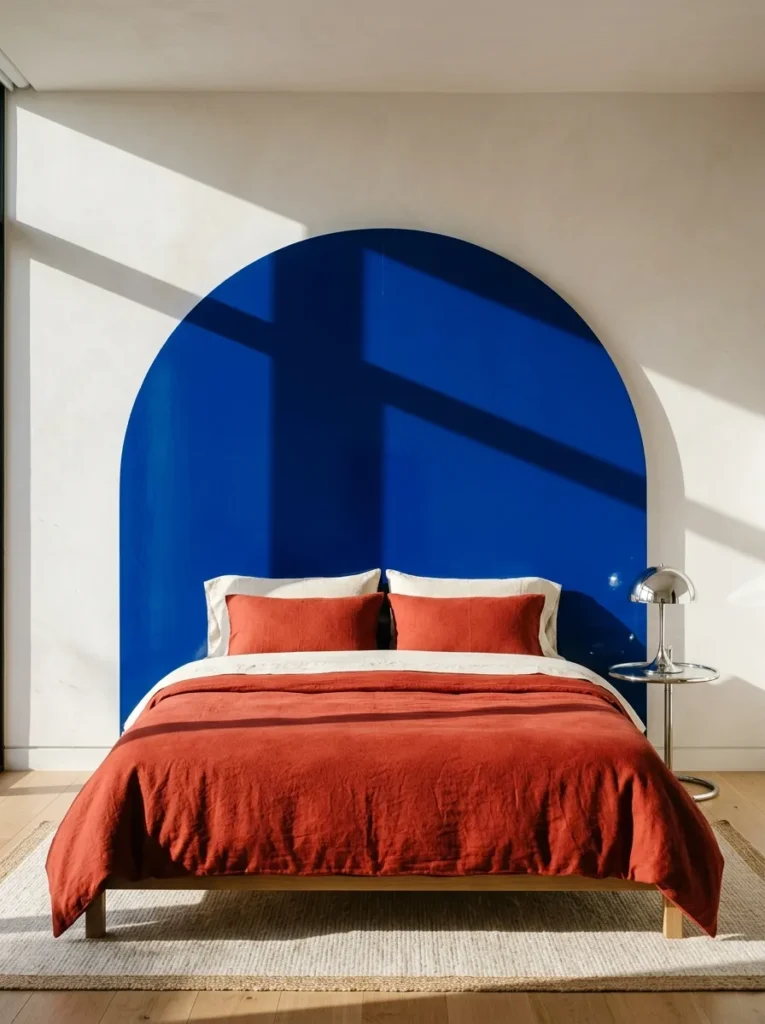
- Materials: ¾-inch birch plywood, 1-by-2-inch poplar cleats, wood filler, primer, high-gloss cobalt-blue enamel paint, construction adhesive.
- Dimensions: 72 inches wide × 60 inches high for a queen bed, with a 36-inch-wide rounded arch centered at the top.
- Build: Draw the arch with a flexible batten, cut the silhouette with a jigsaw, sand the edges, then add rear cleats for rigidity.
- Tools: Jigsaw, circular saw, drill, clamps, sander, level.
- Mounting: Wall-mounted French cleat anchored through the cleat into at least two studs.
- Cost/Time: Approximately $95–$135 and four to six hours, excluding paint drying.
- Skill level: Intermediate.
- Styling: Layer the cobalt headboard with paprika-red bedding, ivory sheets, and a single sculptural chrome lamp.
Why this works: A saturated blue arch turns a simple plywood panel into a graphic architectural statement.
The arch is the trick here: one curved cut changes a flat plywood sheet into something that looks designed rather than improvised. For a queen bed, cut a 72-by-60-inch birch plywood panel, then mark a centered 36-inch-wide arch rising from the top edge. A flexible wooden batten makes a smoother curve than trying to trace a household object. Cut with a jigsaw, sand thoroughly, fill the plywood edges, and prime before applying two coats of high-gloss cobalt-blue enamel. Add two rear poplar cleats to prevent flexing. A circular saw, jigsaw, drill, clamps, and sander are enough for this intermediate project.
My husband would mount this one rather than simply lean it behind the mattress, especially because the 60-inch height gives the panel enough leverage to shift if bumped. Install a French cleat across the upper rear section, driving structural screws through the cleat and into at least two studs. Materials should cost approximately $95–$135, with four to six hours of active work. Once mounted, let the blue shape remain visually dominant. Paprika-red cotton bedding, ivory sheets, and one polished chrome lamp create a deliberate color clash without competing with the unusual silhouette.
5. Tomato Red Ribbed Headboard
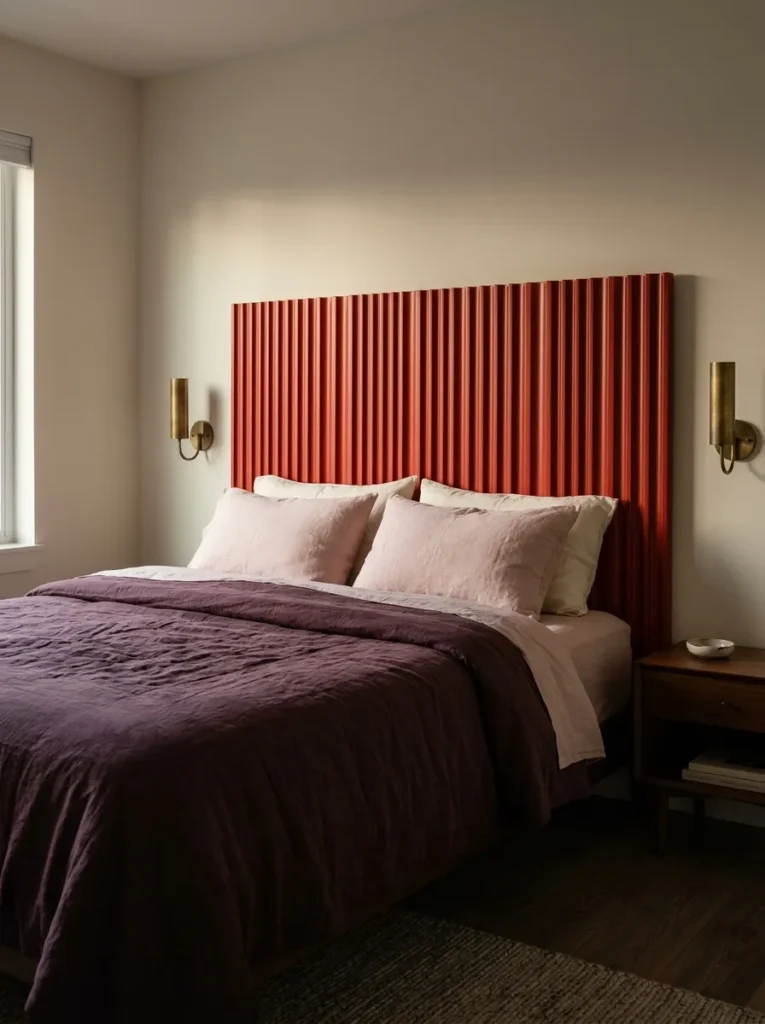
- Materials: ¾-inch MDF, 1-inch half-round pine molding, wood adhesive, brad nails, primer, tomato-red satin cabinet enamel.
- Dimensions: 80 inches wide × 54 inches high for a queen bed, extending 10 inches beyond each mattress side.
- Build: Cut the MDF backing, arrange half-round molding in alternating lengths, glue and pin each piece, then fill, prime, and paint.
- Tools: Miter saw, brad nailer, level, measuring tape, sander.
- Mounting: Wall-mounted using a continuous French cleat secured into studs.
- Cost/Time: Approximately $120–$160 and six hours.
- Skill level: Intermediate.
- Styling: Add a deep plum quilt, pale pink pillowcases, and aged-brass swing-arm sconces mounted to the wall.
Why this works: Uneven vertical ribs give a classic rectangular headboard the energy of a sculptural installation.
Forget perfectly uniform slats for this one; the changing rib heights are what make the surface interesting. Cut an 80-by-54-inch MDF backing panel, then prepare 1-inch half-round pine molding in several lengths ranging from 30 to 54 inches. Arrange the pieces vertically in a loose repeating sequence, keeping their bottoms aligned while allowing the tops to rise and fall. Glue each rib and reinforce it with brad nails before filling nail holes. Prime the entire surface, then apply two coats of tomato-red satin cabinet enamel. A miter saw, nailer, level, measuring tape, and sander are the essential tools for this intermediate build.
The finished panel should be wall-mounted because MDF plus solid molding becomes considerably heavier than it looks. My husband’s rule for projects like this is simple: the hardware needs to carry the finished weight, not merely hold the panel against the wall. Use a continuous French cleat across the rear and secure it into multiple studs. Expect approximately $120–$160 in materials and around six hours of active work. Against the tomato-red ribs, use a deep plum quilt, pale pink pillowcases, and aged-brass swing-arm sconces. The result feels intentionally dramatic without relying on complicated woodworking.
6. Electric Violet Curves
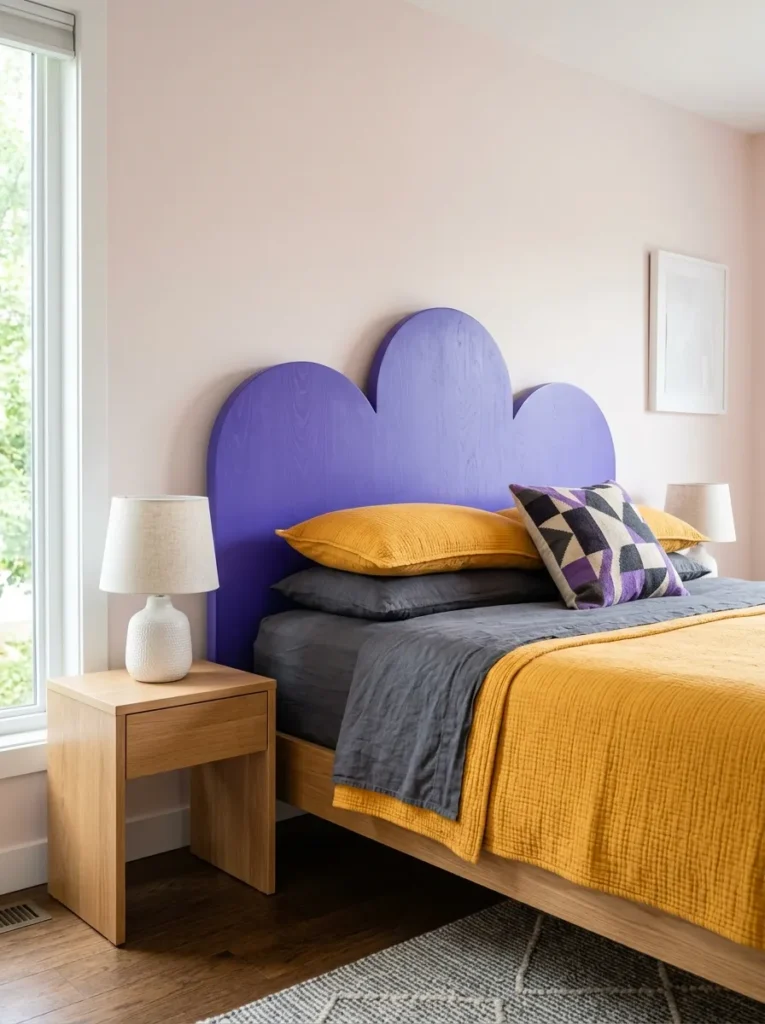
- Materials: Two layers of ½-inch plywood, 1-by-2-inch pine backing strips, wood glue, screws, primer, electric-violet satin paint.
- Dimensions: 84 inches wide × 52 inches high for a queen bed, with three overlapping curved lobes across the top.
- Build: Transfer a full-size paper template, cut matching plywood layers, laminate them together, sand the curved perimeter, then reinforce the rear with pine strips.
- Tools: Jigsaw, drill, clamps, orbital sander, level, paper template.
- Mounting: Freestanding, with two rear legs bolted to a low platform frame; optional anti-tip wall strap for additional security.
- Cost/Time: Approximately $130–$175 and seven to nine hours.
- Skill level: Advanced beginner.
- Styling: Use a marigold cotton coverlet, charcoal sheets, and a small white ceramic table lamp for sharp contrast.
Why this works: Layered plywood curves create a sculptural headboard without requiring complicated bent-wood construction.
A straight rectangle is not your only option when plywood is involved. For this version, create an 84-by-52-inch headboard with three overlapping curved lobes, using a full-size paper template before touching the plywood. Cut two matching ½-inch plywood layers, laminate them with wood glue and screws, then clamp until fully bonded. After curing, use an orbital sander to smooth the entire curved perimeter and add pine strips across the rear for stiffness. Prime carefully around the edges before painting the piece electric violet in a durable satin finish. A jigsaw, drill, clamps, sander, and large template make up the core toolkit.
This headboard stands independently rather than hanging from the wall, so weight distribution becomes especially important. Attach two sturdy rear legs to a low platform frame and bolt the structure together rather than relying on adhesive alone. Add a discreet anti-tip strap to a wall stud if the bedroom will be used by children or if the bed receives heavy movement. Materials should cost about $130–$175, with seven to nine hours of work. Style the violet curves with a marigold cotton coverlet, charcoal sheets, and one small white ceramic lamp. The saturated contrast makes the unusual silhouette feel intentional rather than theatrical.
7. Fuchsia Fan Frame
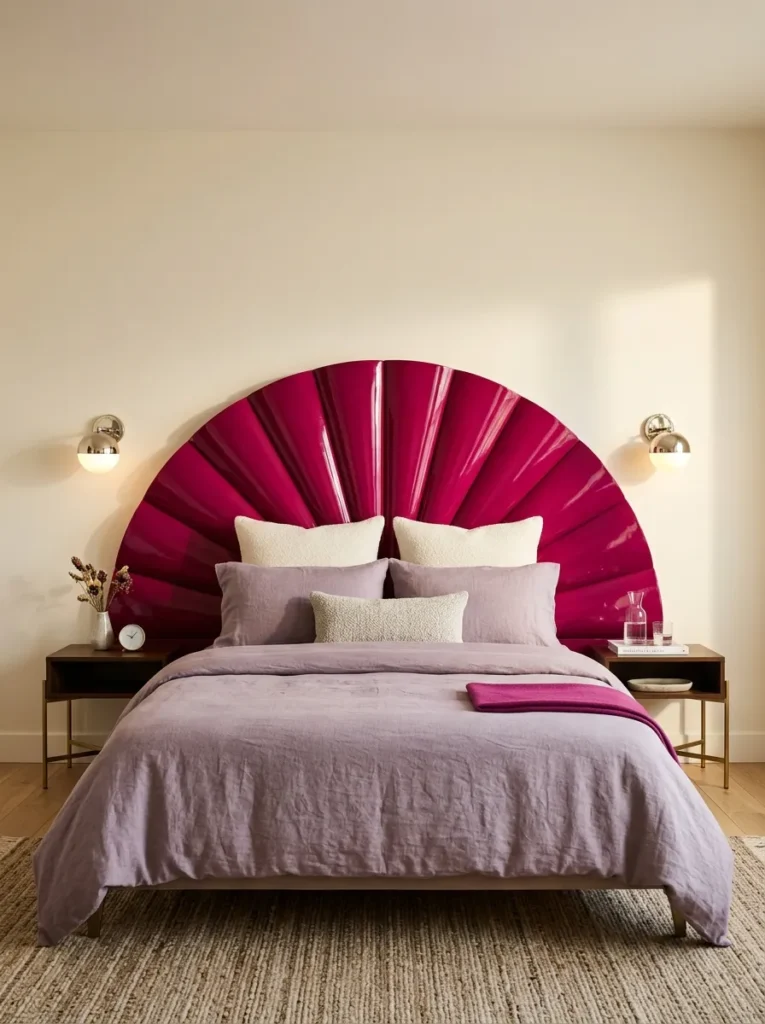
- Materials: ¾-inch birch plywood, 1-by-3-inch poplar, flexible wood veneer, wood glue, screws, primer, high-gloss fuchsia enamel.
- Dimensions: 84 inches wide × 58 inches high, with a 24-inch central fan rising above the side wings.
- Build: Cut three plywood sections, shape the upper curves, join the sections from behind, then apply narrow veneer strips across the face to emphasize the fan pattern.
- Tools: Jigsaw, circular saw, drill, clamps, brad nailer, orbital sander.
- Mounting: Wall-mounted with a heavy-duty French cleat anchored into three or more studs.
- Cost/Time: Approximately $150–$195 and seven to nine hours.
- Skill level: Intermediate.
- Styling: Combine the fuchsia surface with dusty-lilac linen bedding, ivory bouclé pillows, and polished nickel globe sconces.
Why this works: A fan-shaped silhouette gives a saturated color the architectural scale needed to feel sophisticated rather than playful.
The fan shape makes this headboard look far more complicated than the cutting actually is. Build three connected plywood sections for an 84-by-58-inch queen headboard, allowing the center section to rise approximately 24 inches above the side wings. Transfer the curves with a flexible batten, cut them with a jigsaw, and join the panels from behind with poplar braces. Add thin flexible wood veneer strips across the front to emphasize the radial geometry without making the structure excessively heavy. Sand the edges, prime thoroughly, and finish with two coats of high-gloss fuchsia enamel for a polished furniture-like surface.
This is a wall-mounted project, and the broad silhouette makes secure anchoring especially important. Use a continuous hardwood French cleat across the rear and fasten it through multiple studs with structural screws; do not depend on drywall anchors for the primary load. Expect approximately $150–$195 in materials and seven to nine hours of active construction. Style the saturated fuchsia against dusty-lilac linen bedding, ivory bouclé pillows, and polished nickel globe sconces. Keep the surrounding furniture restrained so the fan remains the unmistakable architectural centerpiece of the room.
8. Burnt Orange Channel Headboard
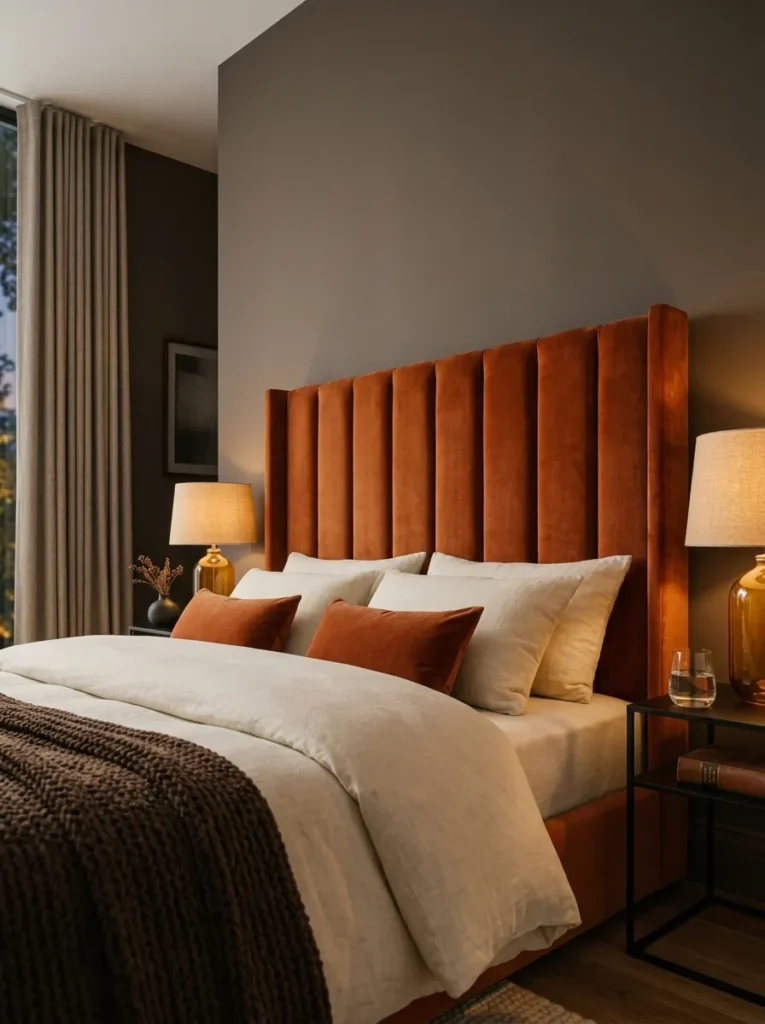
- Materials: ¾-inch plywood, 2-inch high-density foam, cotton batting, burnt-orange performance velvet, 1-inch pine trim, black wood screws.
- Dimensions: 78 inches wide × 50 inches high, divided into five vertical upholstered channels.
- Build: Cut the plywood base, attach five equal foam channels with narrow gaps, wrap each section individually, then secure the upholstered sections to the rear panel.
- Tools: Circular saw, staple gun, drill, measuring tape, scissors, upholstery needle.
- Mounting: Freestanding, attached to two rear legs that bolt to the bed frame.
- Cost/Time: Approximately $135–$180 and five to seven hours.
- Skill level: Beginner-intermediate.
- Styling: Layer cream bedding with a chocolate-brown throw, blackened-steel nightstands, and amber glass lamps.
Why this works: Individual upholstery channels give a simple foam build the tailored appearance of a custom-made furniture piece.
Burnt-orange velvet can look surprisingly refined when the upholstery is divided into disciplined channels rather than gathered into traditional tufting. Cut a 78-by-50-inch plywood backing panel, then divide it into five equal vertical sections. Cover 2-inch high-density foam with cotton batting and performance velvet, keeping every channel tightly tensioned before stapling the fabric behind the plywood. Leave narrow, consistent gaps between the padded sections so the dark base creates graphic definition. A circular saw, staple gun, drill, measuring tape, sharp scissors, and upholstery needle are enough for this beginner-intermediate construction.
Because this headboard is freestanding, its legs need to be treated like structural components rather than decorative supports. Attach two substantial rear legs and bolt them directly to compatible bed-frame brackets, then add a rear crossbar between the legs to reduce lateral movement. For upholstered projects, choose foam and fabric with appropriate residential-use and flammability labeling rather than assuming every upholstery material is interchangeable. Budget approximately $135–$180 and allow five to seven hours. Finish the bedroom with cream bedding, a chocolate-brown throw, blackened-steel nightstands, and amber glass lamps that echo the velvet’s fiery undertone.
9. Ultramarine Lattice
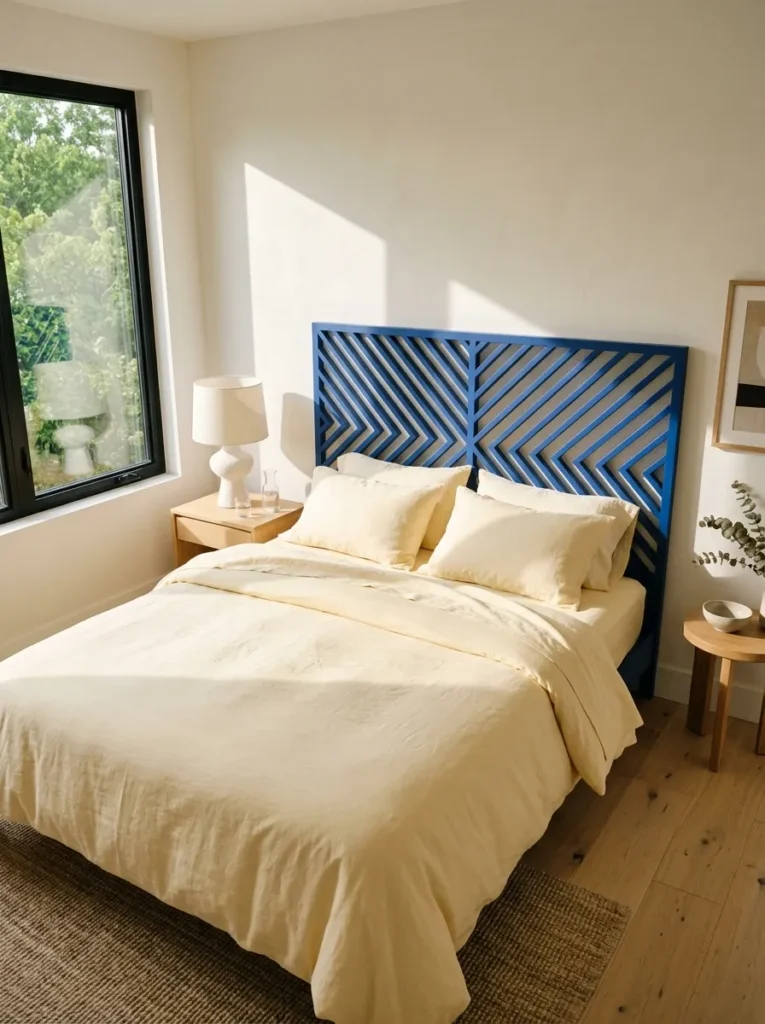
- Materials: ¾-inch MDF, 1-by-2-inch poplar lattice strips, wood adhesive, 18-gauge brad nails, primer, ultramarine-blue cabinet paint.
- Dimensions: 80 inches wide × 56 inches high, with a 4-inch outer border and diagonal lattice crossing the center.
- Build: Paint the MDF backing first, cut diagonal strips, dry-lay the lattice, then glue and pin each intersection before applying the final finish.
- Tools: Miter saw, brad nailer, clamps, level, sanding block.
- Mounting: Wall-mounted using a rear French cleat fastened into studs.
- Cost/Time: Approximately $105–$145 and five to seven hours.
- Skill level: Intermediate.
- Styling: Pair with pale butter-yellow bedding, cream linen pillows, and a sculptural white plaster lamp.
Why this works: A crisp diagonal lattice turns a flat painted panel into a graphic pattern with genuine dimensional depth.
This design gets its drama from geometry rather than complicated woodworking. Start with an 80-by-56-inch MDF panel and establish a 4-inch border around the perimeter. Paint the backing ultramarine blue before installing the lattice so the color shows cleanly through every opening. Cut 1-by-2-inch poplar strips on a miter saw, dry-lay them diagonally in crossing directions, and mark each intersection before applying adhesive and brad nails. Sand any raised joints after the glue cures, then add a final coat of ultramarine cabinet paint. Precise measuring matters more than advanced skill, making this an intermediate project with a very polished result.
The husband-tested part of this build is the mounting: once several wooden strips are attached, the panel becomes heavier and more awkward to handle than a plain MDF sheet. A French cleat spreads the load across the wall, while structural screws driven into studs keep the installation secure. Plan for approximately $105–$145 and five to seven hours of active work. Against the ultramarine lattice, pale butter-yellow bedding creates a striking complementary contrast, while cream linen pillows and a sculptural white plaster lamp keep the room from becoming visually crowded. The open pattern also lets the wall color participate in the composition.
10. Vertical Channel Wingback
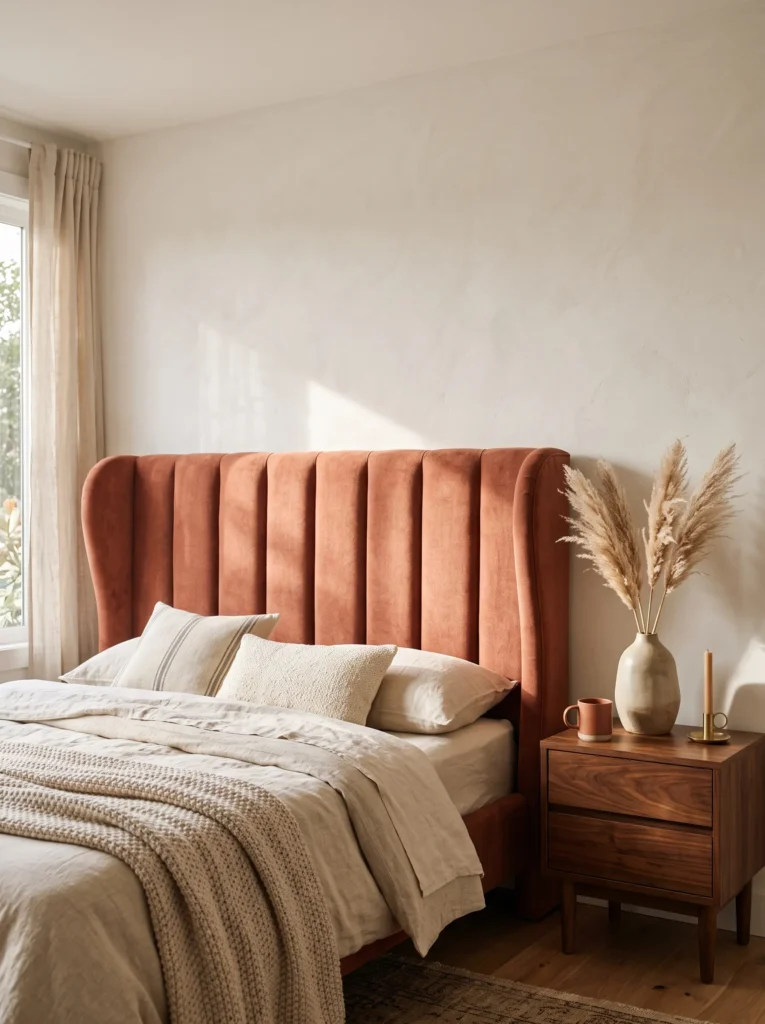
- Materials: 3/4-inch plywood, 2-inch high-density foam, quilt batting, boucle upholstery fabric in dusty terracotta, fire-rated foam padding, heavy-duty staples, French cleat hardware
- Dimensions: 60″ wide x 54″ tall for a queen (scale to 76″ for king, 54″ for full)
- Tools needed: jigsaw, staple gun, electric drill, fabric scissors, measuring tape
- Construction steps: cut plywood into a wingback silhouette with curved top corners, divide foam into six vertical channels, wrap batting and fabric around each channel individually, pull taut and staple to the back board, then attach the cleat
- Cost & time: roughly $140 in materials, 6-8 hours across a weekend
- Mounting: wall-mounted with a French cleat anchored into studs
- Skill level: intermediate — approachable for a first upholstery project, though the channel work rewards patience
Why this works: Channel tufting reads as genuine furniture rather than a craft project, because the vertical lines create shadow and structure that flat upholstery can’t fake.
A wingback silhouette does something flat headboards can’t — it wraps slightly around the pillows, which changes how the whole wall reads at a glance. The vertical channels catch light differently depending on the time of day, giving the piece a kind of quiet movement even when the room is still. Because the foam is fire-rated and the frame is solid plywood rather than a hollow shell, the finished headboard has real weight and durability, not the flimsy give-and-flex feel of a store-bought upholstered version built for quick shipping rather than years of use.
I’ve built two of these channel-tufted headboards now — one for our own guest room, one for a client’s primary suite — and both times the biggest surprise was how much the wingback corners softened the whole room. The curved top edges keep the piece from feeling boxy against the wall, which matters most in smaller bedrooms where a rectangular headboard can visually shrink the space. Boucle fabric hides small sewing imperfections better than smooth linen, which makes it forgiving for a first attempt. Once mounted, the headboard becomes the anchor the rest of the room’s palette can build around.
11. Reclaimed Plank & Iron Pipe
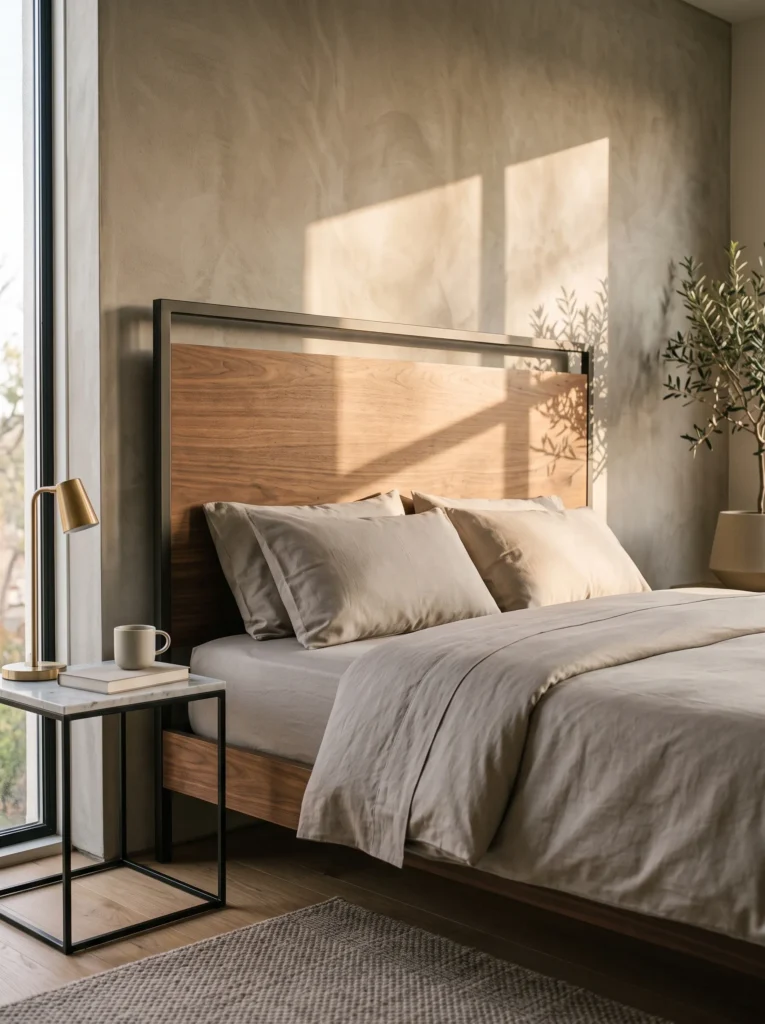
- Materials: reclaimed barnwood planks in weathered gray and rust tones, black iron pipe fittings (1/2-inch, flanges, elbows), wood screws, wood glue, matte polyurethane sealant
- Dimensions: 66″ wide x 48″ tall for queen, plank widths varying 4″-8″
- Tools needed: circular saw, drill, pipe wrench, sander, level
- Construction steps: sand and seal planks, arrange in a staggered vertical pattern and screw to two horizontal support cleats on the back, assemble the iron pipe frame as a floating leg base, attach the panel to the pipe frame with flange brackets
- Cost & time: $180-$220, roughly 10 hours across a full weekend including drying time
- Mounting: freestanding — pipe legs bolted to the back, no wall anchoring required
- Skill level: advanced — pipe threading and staggered plank alignment take practice
Why this works: A freestanding pipe-leg base means the headboard never has to fight an uneven wall, which is the single biggest failure point of reclaimed wood builds.
My husband keeps a stack of reclaimed barnwood in the garage from job sites where owners wanted it hauled away, and this headboard started as an experiment with leftover boards nobody wanted. Reclaimed wood carries genuine variation — knots, nail holes, tonal shifts between gray and rust — that new lumber can’t replicate no matter how it’s stained. Pairing it with black iron pipe hardware adds an industrial counterweight, keeping the piece from reading rustic-cabin instead of intentional and current. The staggered plank pattern also hides minor warping better than a perfectly flush panel would, which matters with reclaimed material.
Freestanding construction solves a real problem reclaimed wood headboards run into — uneven walls. Older homes, especially ones with plaster rather than drywall, rarely have perfectly flat surfaces, so a wall-mounted panel can pull away unevenly over time. Resting the piece on its own pipe-leg base sidesteps that entirely, and it means the headboard can move with you to a new house without patching drywall. Visually, the exposed pipe joints read as a deliberate design choice rather than hardware, especially against the varied wood tones. The result looks like a specialty furniture piece, not a weekend build.
12. Arched Cane Panel
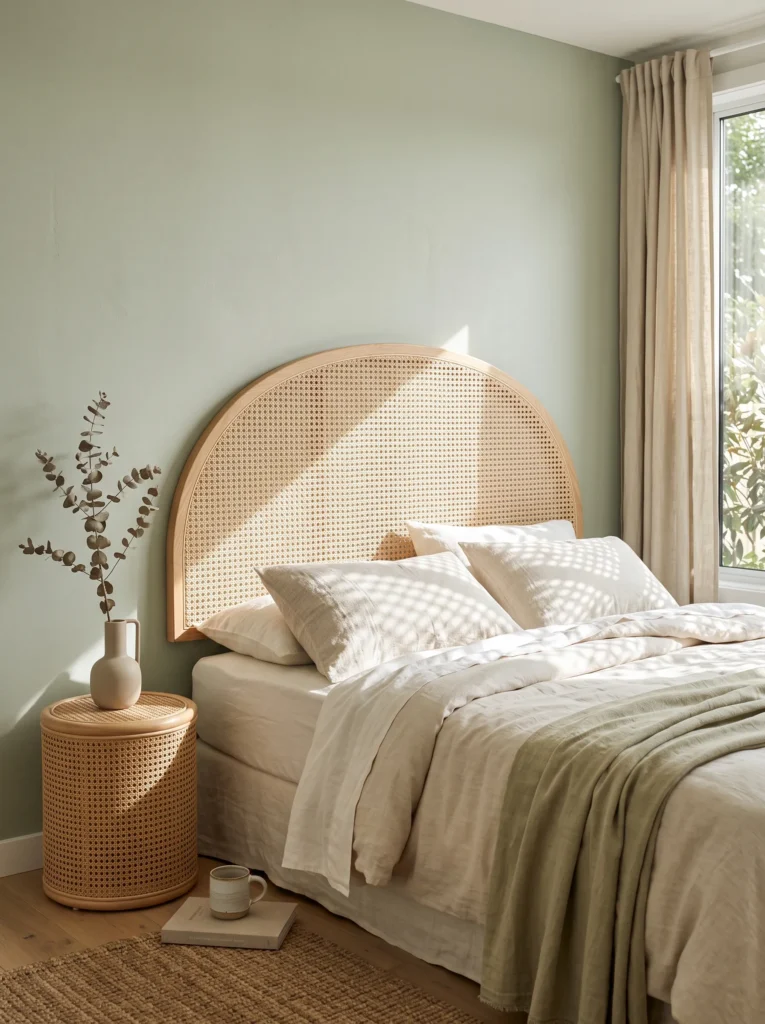
- Materials: pre-woven natural cane webbing, 1×2 pine for the frame, curved plywood template for the arch, wood glue, brass tacks, clear matte sealant
- Dimensions: 58″ wide x 52″ tall arch for queen, adjustable for full or king
- Tools needed: jigsaw, staple gun, sandpaper, clamps
- Construction steps: cut plywood into an arched silhouette, briefly soak the cane webbing to increase flexibility, stretch it over the frame opening and secure with brass tacks around the edge, trim excess cane and sand the frame smooth, seal with matte polyurethane
- Cost & time: $95-$120, one afternoon plus overnight drying
- Mounting: wall-mounted with a keyhole bracket, light enough for drywall anchors alone — no stud required
- Skill level: beginner-friendly
Why this works: An open cane weave lets light pass through instead of blocking it, which is why it doesn’t visually shrink a small bedroom the way a solid panel does.
Cane webbing has come back into serious design rotation, and there’s a real reason beyond nostalgia — the open weave lets light pass through it instead of blocking it, which keeps a headboard from visually darkening a small bedroom. I first used pre-woven cane on a client’s guest room because the walls were tight on both sides of the bed, and a solid panel would have felt heavy in the space. The arched shape adds a soft, architectural line that most flat headboards skip entirely. Because cane webbing comes pre-woven, this build skips the most tedious step of hand caning.
This headboard works especially well in rentals or homes where you’re not ready to commit to permanent wall changes, since the keyhole mount goes into standard drywall anchors rather than studs. Natural cane also pairs with almost any bedding without competing for attention, which makes it a flexible choice if your color palette changes seasonally. The open weave means light and shadow shift across the headboard throughout the day, giving it a texture that photographs differently in morning versus evening light. It’s a build that looks intentional and finished, not like a stopgap piece waiting to be replaced.
13. Scalloped Silhouette Panel
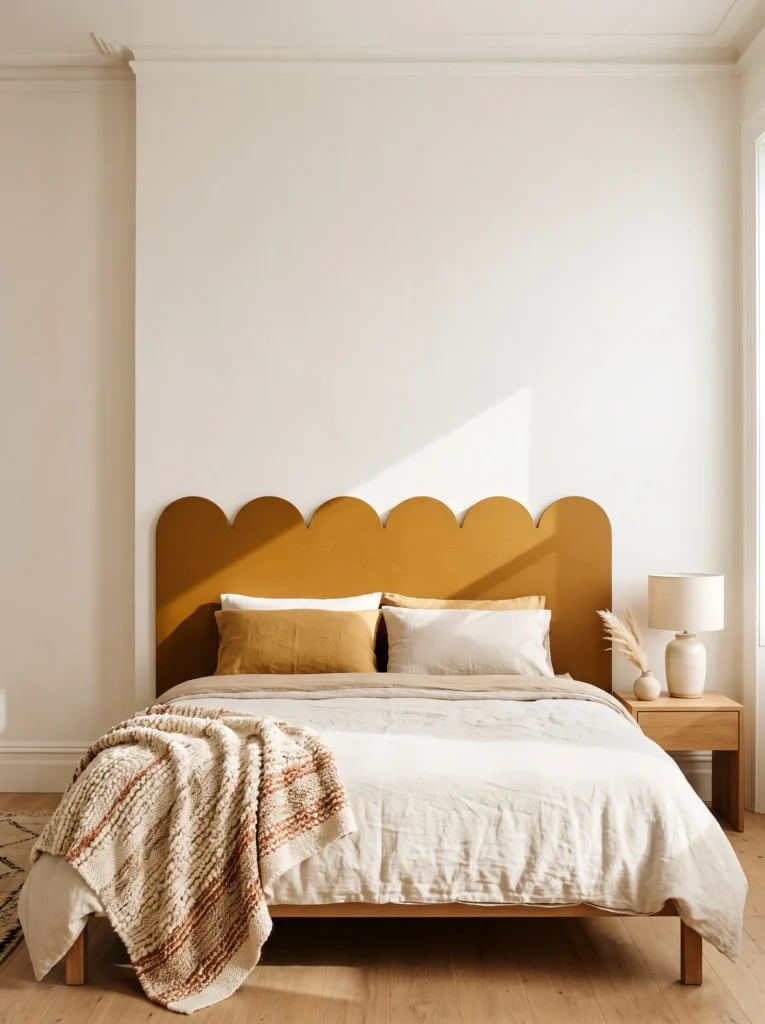
- Materials: 3/4-inch plywood, wood filler, primer, matte paint in deep ochre, fine-grit sandpaper
- Dimensions: 62″ wide x 46″ tall, scalloped top edge, sized for queen
- Tools needed: jigsaw, orbital sander, level, stud finder, drill
- Construction steps: draw the scallop pattern using a bowl or compass template, cut along the curved line with a jigsaw, sand edges smooth and fill grain with wood filler, prime and paint two coats, mount directly to studs
- Cost & time: $60-$85, one day for cutting and priming plus a second day for paint to cure
- Mounting: wall-mounted, screwed directly into studs — no cleat needed since the panel itself is lightweight
- Skill level: beginner-friendly, though scallop spacing benefits from a template
Why this works: Finding two studs instead of one is what keeps a wide, heavy panel from tipping forward over time — a detail most DIY guides skip entirely.
A stud finder matters more on this build than people expect, since a flat plywood panel this size relies on direct screws rather than a hanging bracket. My husband’s rule for anything wall-mounted over 40 pounds: find two studs, not one, so weight distributes evenly and the panel can’t tip forward over time. The scalloped top edge is what separates this from a plain rectangle — the repeating curves catch light along their rounded edges, creating a soft shadow line a straight top can’t produce. A deep clay or ochre paint color makes the shape read clearly from across the room.
This is one of the fastest builds in the group, but speed doesn’t mean it looks unfinished. A single, saturated paint color turns a simple plywood cutout into a graphic focal point, especially against a lighter wall where the scalloped edge reads almost like wallpaper. Skipping fabric and foam also means there’s nothing to sag, stain, or need reupholstering down the line, which makes this a practical option for a kid’s room or guest space that sees heavy use. Because the panel mounts flush to the wall, it also works in smaller bedrooms where every inch of floor space matters.
14. Rope-Wrapped Ladder Frame
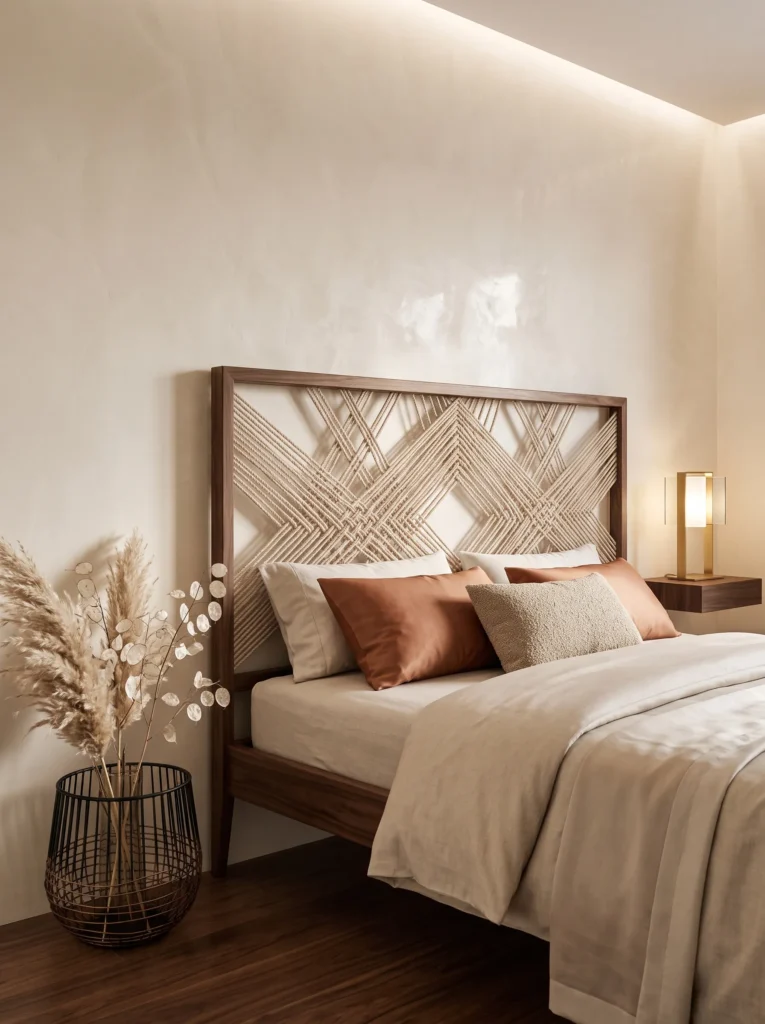
- Fact: Rope-wrapped furniture pieces gained traction in coastal design because manila and jute rope both handle humidity better than most upholstery fabrics, making them a practical choice for bedrooms without climate control year-round.
- Materials: 2×4 pine for the frame, 3/8-inch natural jute rope (approximately 200 feet), wood screws, wood glue, matte sealant
- Dimensions: 60″ wide x 50″ tall for queen, five horizontal rungs spaced 8″ apart
- Tools needed: drill, miter saw, clamps, utility knife
- Construction steps: build a rectangular pine frame with five evenly spaced horizontal dowels acting as rungs, wrap jute rope diagonally across the frame in a crisscross pattern, secure rope ends with wood glue and tuck behind the frame, seal the exposed wood
- Cost & time: $75-$100, one full day including rope-wrapping time
- Mounting: freestanding on two angled wood legs, no wall anchoring
- Skill level: intermediate — the rope tension takes a few tries to get even
Why this works: The diagonal crisscross pattern creates visual texture without any fabric or foam, so there’s nothing to sag, stain, or flatten over time the way upholstery eventually does.
Rope as a building material sounds unconventional until you see it holding tension across a frame — it behaves more like a structural element than a decorative one. The crisscross pattern catches light in a way flat wood or fabric can’t, throwing small triangular shadows across the wall behind it that shift throughout the day. Jute rope also has a rougher, more organic texture than the smoother cotton rope often used in macrame, which keeps this build from reading overly delicate. Because there’s no foam or fabric involved, humidity and everyday wear are far less of a concern than with an upholstered piece.
The freestanding leg base means this headboard never touches the wall at all, which solves a specific problem for renters or anyone who moves often — there’s no drywall patching required if you relocate it. I’ve noticed jute rope also tends to loosen slightly in the first few weeks as it settles, so retightening the wrap once after the initial break-in period keeps the pattern crisp. Pairing it with a warm wood-tone frame rather than painted pine keeps the whole piece feeling grounded and natural, which works especially well against a plain white or pale wall.
15. Fluted Half-Round Panel
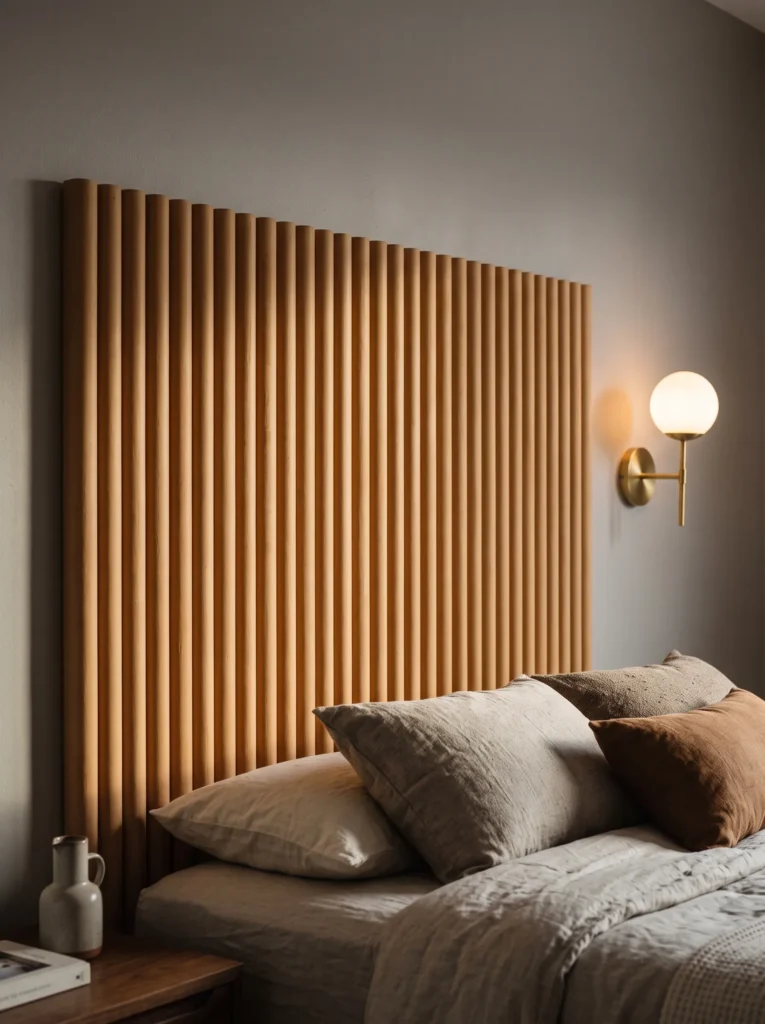
- Materials: 3/4-inch MDF backing board, half-round wood dowel molding (1-inch diameter, approximately 40 linear feet), wood glue, brad nails, primer, paint in warm clay
- Dimensions: 64″ wide x 48″ tall for queen, dowels spaced 1/2″ apart running vertically
- Tools needed: miter saw, brad nailer, level, tape measure, sander
- Construction steps: cut MDF to size and prime, cut dowel molding to matching height, glue and brad-nail each piece vertically across the panel with consistent spacing, sand any uneven seams, paint the entire panel a single solid color to unify the fluting
- Cost & time: $110-$150, one full weekend including paint drying time
- Mounting: wall-mounted with a French cleat, anchored into studs given the added weight of the MDF and molding
- Skill level: intermediate — spacing consistency is the main challenge
Why this works: Fluted paneling is one of the clearest signals of current, higher-end design, largely because the repeated vertical lines create depth and shadow that flat surfaces simply can’t produce.
This is the build I get asked about most when people see it in photos, because it looks like something pulled from a furniture showroom rather than a garage project. Painting the entire panel — dowels and backing board alike — in one solid color is what sells the illusion; it hides the seams between individual dowels and makes the whole thing read as a single, sculpted surface instead of a collection of parts. A matte clay or warm terracotta paint tends to show off the fluted shadow lines best, since flat sheens absorb light rather than bouncing it. Glossy paint flattens the texture and works against the whole point of the build.
Getting the dowel spacing consistent is genuinely the hardest part, and I’d recommend cutting a spacer block from scrap wood rather than eyeballing each gap — it’s the difference between a headboard that looks professionally made and one where uneven spacing draws the eye for the wrong reason. Because the finished panel is heavier than plywood alone, mounting into studs isn’t optional here. Once it’s up, the fluting reads almost like millwork, which is a detail most people don’t expect from a weekend build.
16. Angular Inlay Panel
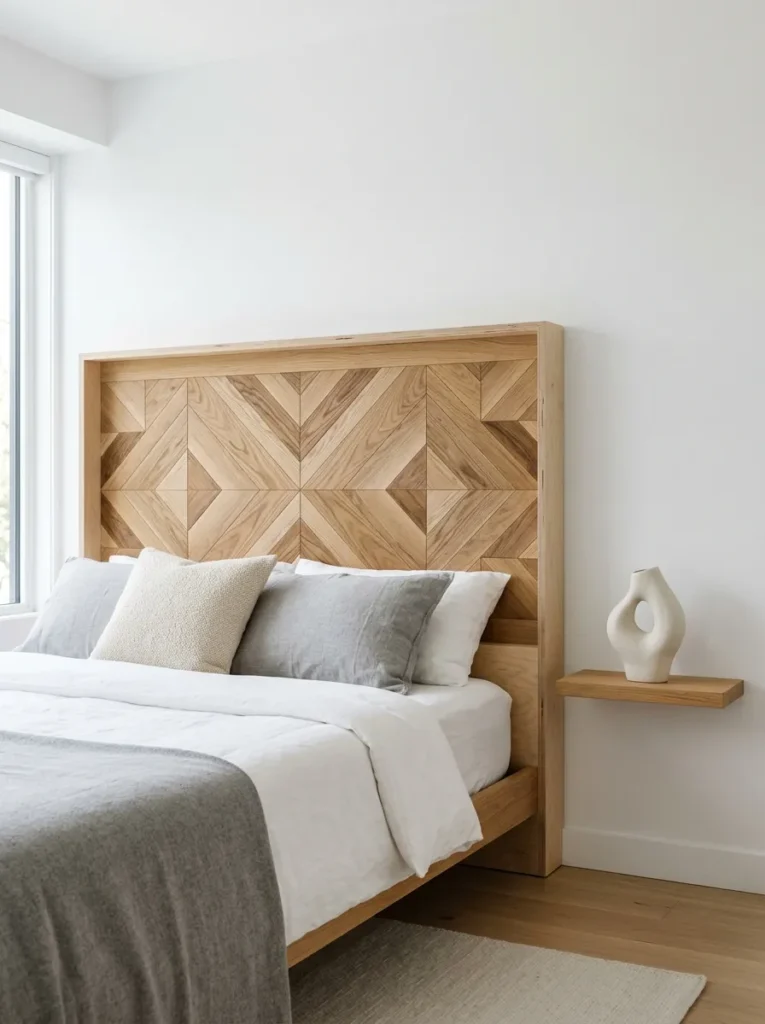
- Materials: 1/2-inch plywood base, thin oak veneer strips (1/4-inch wide), wood glue, painter’s tape, clear matte polyurethane
- Dimensions: 60″ wide x 44″ tall for queen
- Tools needed: miter saw, straightedge, clamps, sander
- Construction steps: map an asymmetric geometric line pattern onto the plywood using painter’s tape as a guide, cut oak veneer strips to match each angled segment, glue strips along the taped lines to form a continuous inlay pattern, remove tape once dry, sand and seal the entire surface
- Cost & time: $130-$160, one full weekend including glue-drying time between sections
- Mounting: wall-mounted with a French cleat into studs
- Skill level: advanced — precise angle cuts are unforgiving of mistakes
Why this works: An asymmetric line pattern avoids the perfectly symmetrical chevron most geometric headboards default to, which is what keeps this from looking like a kit you bought rather than a piece you designed.
Most geometric headboards default to a symmetrical chevron or herringbone pattern, and there’s nothing wrong with that — but an asymmetric inlay is what actually stops the scroll. I designed the line pattern for this one directly on the wall with painter’s tape before committing to a single cut, adjusting the angles until the composition felt balanced rather than centered. Oak veneer strips against a lighter painted or natural plywood base create real contrast without needing paint at all, letting the wood grain do the visual work. It’s a build that leans more toward wall art than traditional furniture, which is exactly the point.
Precision matters more here than in almost any other build in this list — even a one-degree miter error becomes visible once several angled strips meet at a single point. I’d recommend cutting one full section, dry-fitting it against the plan, and only then committing glue, rather than cutting all the strips upfront. The payoff is a headboard that looks custom-commissioned rather than assembled from a box, and because it’s essentially a flat inlay rather than a padded or textured build, it works particularly well in a modern or minimalist bedroom that wants one striking, graphic element rather than several competing textures.
17. Leather Strap & Walnut Frame
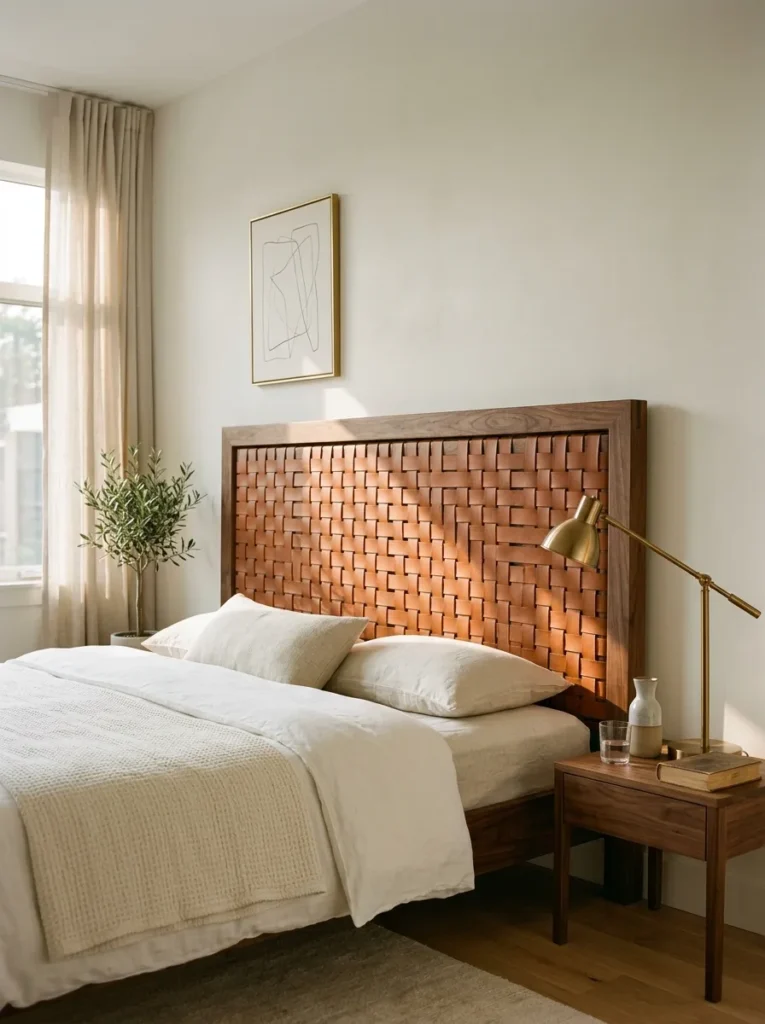
- Materials: solid walnut boards for the frame, full-grain leather strapping (2-inch width, approximately 30 feet), brass upholstery nails, wood glue, leather conditioner
- Dimensions: 58″ wide x 46″ tall for queen
- Tools needed: miter saw, drill, leather hole punch, mallet
- Construction steps: build a solid walnut frame with mitered corners, punch evenly spaced holes along the leather straps, weave the straps horizontally across the frame opening in an over-under pattern, secure each strap end with brass upholstery nails, condition the leather once installed
- Cost & time: $160-$200, one full weekend given the leather punching and weaving time
- Mounting: wall-mounted with a French cleat into studs, given the solid wood frame weight
- Skill level: advanced — leather weaving requires patience and even tension
Why this works: Leather straps develop a natural patina with wear, so unlike fabric upholstery, this headboard actually looks better with age rather than needing to be replaced.
I’ve seen this exact combination — walnut and leather — used in high-end furniture lines for years, and there’s a practical reason it holds up so well as a headboard. Leather straps develop a natural patina over time rather than staining or flattening the way fabric upholstery does, so the piece genuinely improves with age instead of needing to be reupholstered every few years. The over-under weave pattern also means airflow moves through the strapping, which keeps it from trapping heat or moisture the way a fully upholstered panel can in warmer climates like ours here in Austin. Solid walnut framing adds real weight and durability that plywood alone can’t match.
Getting even tension across each leather strap is the part that takes practice — pull too tight and the wood frame can bow slightly, too loose and the weave looks sloppy. I’d recommend weaving from the center outward rather than starting at one edge, which keeps the tension more balanced across the whole panel. Brass upholstery nails along the strap ends add a small but noticeable detail that ties the metal tone into the rest of the room’s hardware. It’s one of the more expensive builds here, but it’s also the one most likely to outlast every other piece of furniture in the room.
18. Shou Sugi Ban Charred Wood Panel
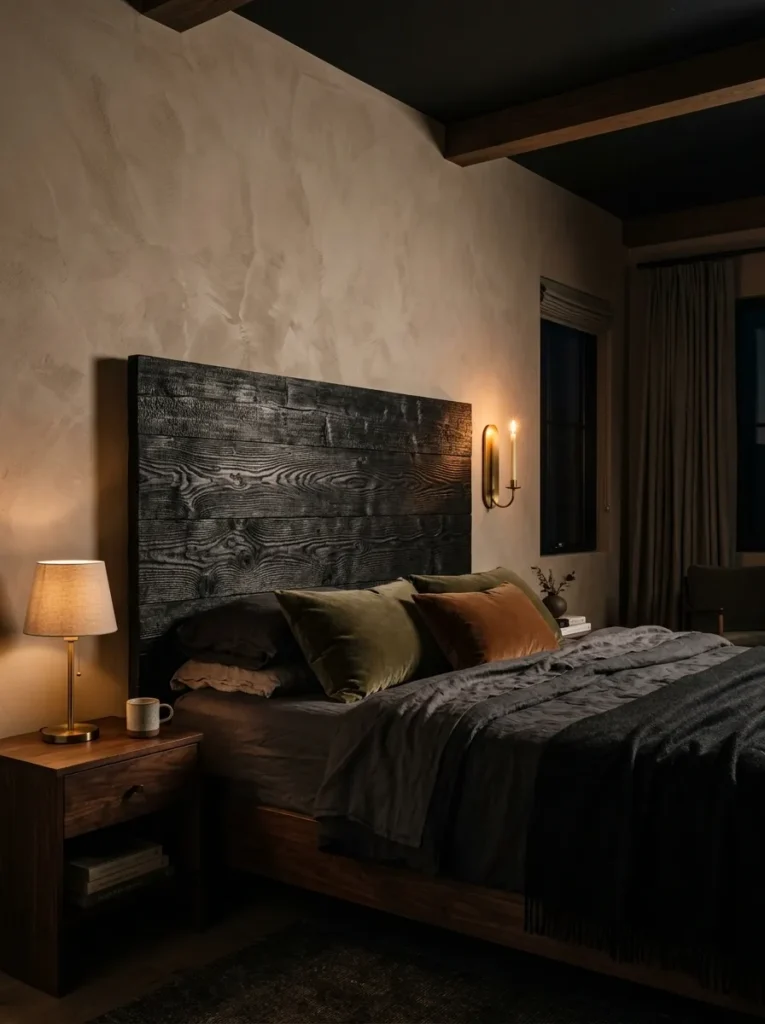
- Fact: Shou sugi ban, the traditional Japanese technique of charring wood, was originally developed to make timber naturally resistant to rot, pests, and fire without chemical treatment — a functional origin most decor coverage skips entirely.
- Materials: cedar boards (1×6, tongue-and-groove), butane torch, wire brush, natural tung oil finish
- Dimensions: 60″ wide x 50″ tall for queen
- Tools needed: torch, wire brush, miter saw, drill, respirator mask
- Construction steps: char each cedar board evenly with the torch until the surface blisters and blackens, cool completely, wire-brush the charred surface to reveal the wood grain beneath, assemble boards tongue-and-groove onto a support frame, finish with tung oil to seal and deepen the black tone
- Cost & time: $120-$150, one full weekend — charring and cooling time adds up
- Mounting: wall-mounted with a French cleat into studs
- Skill level: advanced — open-flame work requires caution and ventilation
Why this works: The wire-brushing step is what separates a genuinely charred headboard from a flat black-painted one, because it exposes the natural grain pattern hiding beneath the burn.
I’ll admit this was the build I was most nervous to try, mostly because working with an open torch indoors isn’t something I’d recommend without good ventilation and a fire extinguisher within reach. But the result is unlike anything paint can replicate — the wire-brushing step afterward strips away the loose char and reveals the wood grain underneath, so the surface reads black but textured rather than flat. Cedar chars unevenly in the best way, with lighter streaks running through the deep black where the grain resisted the flame differently.
Tung oil is what finishes the look, deepening the black tone while also sealing the surface so it doesn’t transfer soot onto bedding or hands. This headboard photographs beautifully in almost any light because the texture catches shadow differently depending on the angle — matte and moody at night, subtly striped with grain in daylight. It pairs especially well with warm brass or unlacquered metal hardware nearby, since the contrast between deep charred wood and warm metal tones feels intentional rather than accidental. It’s a striking, dramatic anchor for a bedroom that wants real visual weight.
19. Draped Linen & Brass Rod
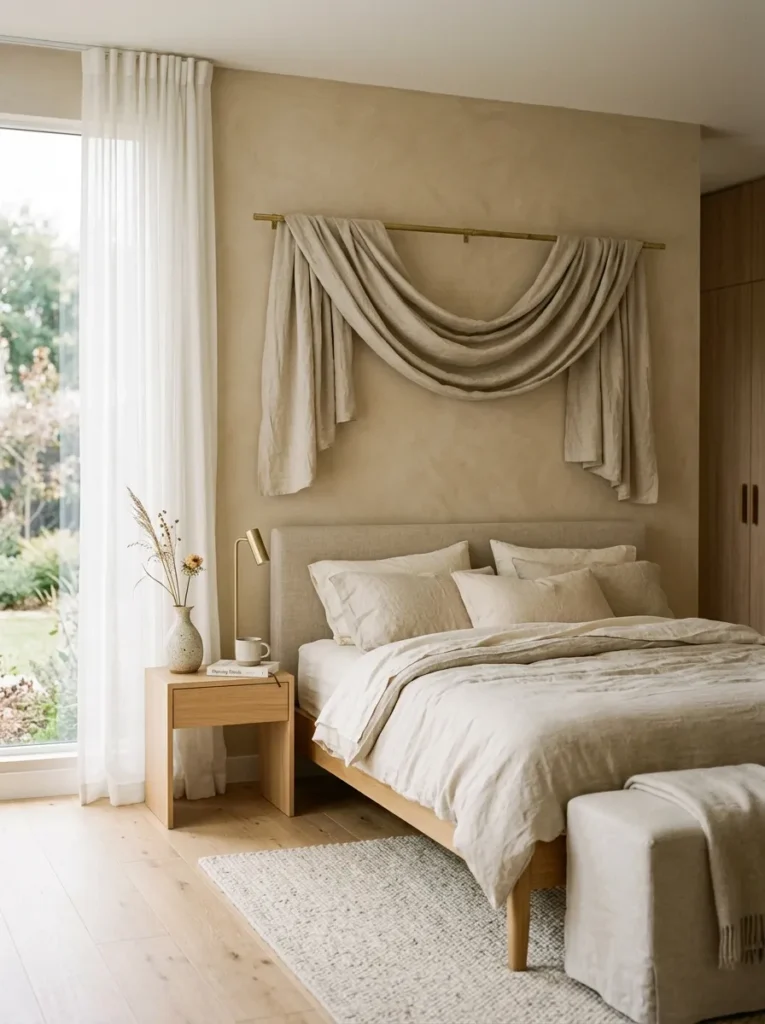
- Materials: heavyweight linen fabric (unbleached, natural), unlacquered brass curtain rod, brass finials, curtain rings, fire-rated interlining
- Dimensions: rod spans 66″ for queen, linen panel drapes to roughly 40″ in height
- Tools needed: drill, level, stud finder, sewing machine or fabric glue
- Construction steps: hem the linen panel and sew a rod pocket or attach curtain rings along the top edge, mount the brass rod to the wall using the stud finder to locate secure anchor points, hang the linen panel so it drapes with soft, loose folds behind the pillows
- Cost & time: $65-$90, one afternoon
- Mounting: wall-mounted rod, anchored into studs on both ends to support the fabric weight over time
- Skill level: beginner-friendly
Why this works: Unlike a stretched, stapled panel, draped linen holds soft folds that shift slightly with airflow, giving the headboard a quiet, lived-in movement most rigid builds can’t achieve.
There’s a real difference between fabric stretched tight over a board and fabric left to drape, and it comes down to how the folds interact with light. A draped linen panel holds soft, irregular creases that catch shadow differently depending on the time of day, which gives the whole wall a gentle sense of movement even though nothing is actually moving. Unbleached, heavyweight linen holds its drape best — lighter cottons tend to look flat and thin once hung, losing the soft folds that make this build feel intentional rather than makeshift.
Even though this is one of the simplest builds in the group, the mounting still needs real anchoring — a fabric panel and rod combination is lighter than a built panel, but a sagging rod over months of use is a common failure point when it’s only anchored into drywall. Finding studs on both ends keeps the rod level and secure long-term. Unlacquered brass hardware develops a soft patina over time rather than staying shiny, which suits the relaxed, textural quality of the linen. It’s an especially good option for a rental where permanent construction isn’t allowed.
20. Sculptural Curved Plaster Niche
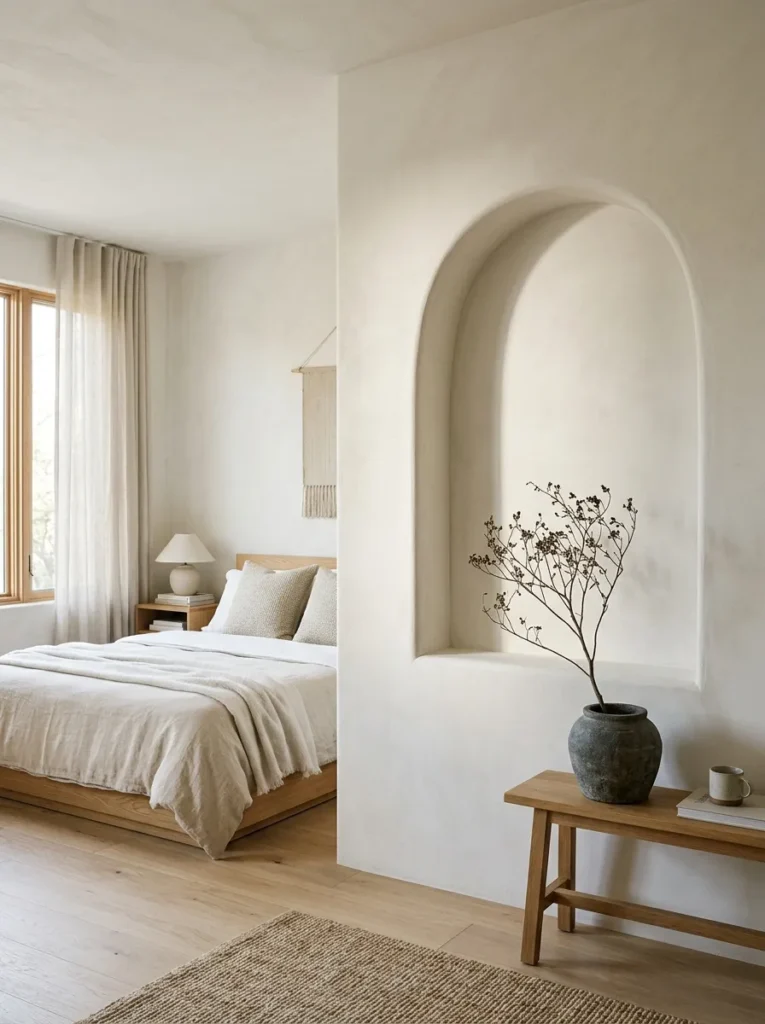
- Materials: plaster of Paris or joint compound, expanded metal lath, wood furring strips, fine sandpaper, matte sealant
- Dimensions: 64″ wide x 52″ tall arched recess built out from the wall roughly 4″-6″
- Tools needed: jigsaw, drill, trowel, sanding block, level
- Construction steps: build a curved furring strip frame projecting slightly off the wall, attach metal lath over the frame to create a rough surface for adhesion, apply plaster in thin layers with a trowel, building up the curved arch shape, sand smooth between coats, seal with matte finish
- Cost & time: $140-$180, multi-day project given plaster drying time between coats
- Mounting: semi-permanent, screwed directly into wall studs as a built-out structure rather than a hung panel
- Skill level: advanced — plaster work has a real learning curve
Why this works: A curved plaster form built directly onto the wall creates the illusion of an architectural niche, which is why it reads as a permanent renovation rather than a removable headboard.
This is the most ambitious build in the entire list, and it’s the one my husband actually helped frame out, since it behaves more like a small renovation than a furniture project. The furring strips create the curved shape first, and the plaster goes on in thin layers rather than one thick coat — trying to rush it leads to cracking as it dries. What makes this worth the effort is the shadow the curve casts along the wall; unlike a flat panel, a projected, arched form catches light the way real architecture does, with soft gradients rather than a hard edge.
Because this headboard is built into the wall structure rather than mounted onto it, it’s not a build for renters or anyone planning to move soon — it’s closer to a permanent architectural feature. The upside is a headboard that will never need replacing, sagging, or reupholstering, since plaster doesn’t wear the way fabric or wood finishes do. Leaving it unpainted in its natural warm white tone lets the curved shadow do the visual work, though it also takes tinted plaster beautifully if you want a soft color built into the material itself.
21. Woven Rattan Sunburst
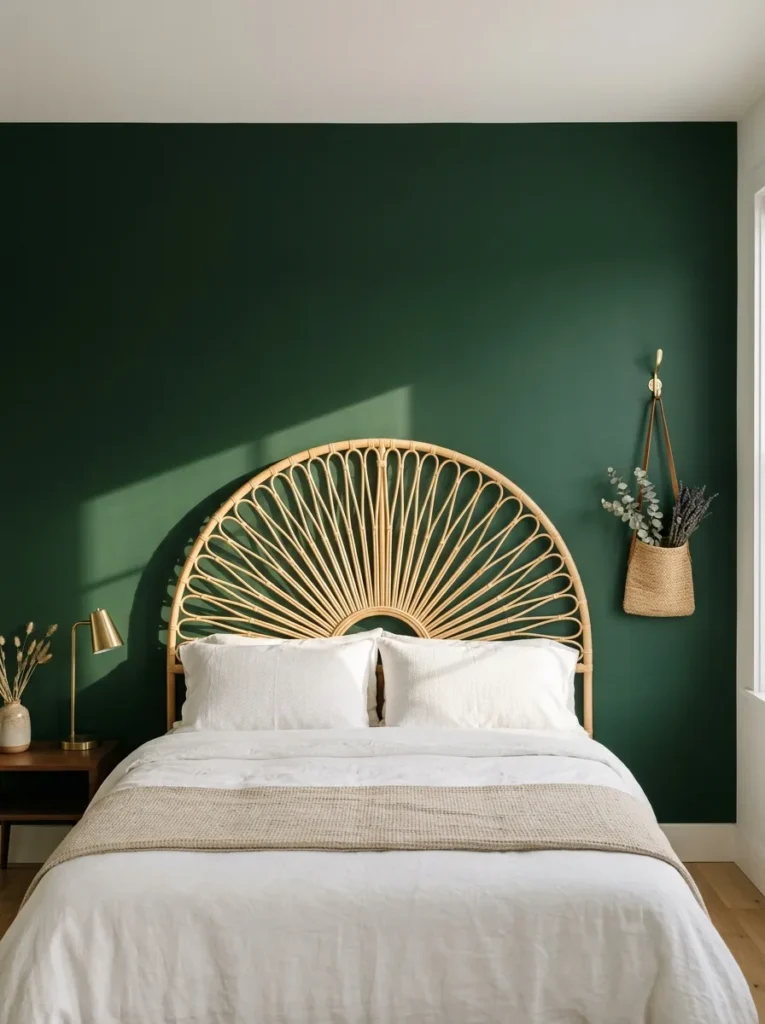
- Materials: thin flexible rattan reed (pre-soaked), circular plywood base cut into a half-moon, wood glue, brass upholstery tacks, matte sealant
- Dimensions: 56″ wide x 44″ tall half-moon shape for queen
- Tools needed: jigsaw, clamps, wire cutters, sander
- Construction steps: cut the plywood into a half-moon silhouette, soak rattan reed until pliable, arrange strands radiating outward from a central point like sun rays, secure ends with wood glue and brass tacks along the curved outer edge, trim excess and seal
- Cost & time: $85-$110, one full day including rattan soaking time
- Mounting: wall-mounted with a keyhole bracket, light enough for drywall anchors
- Skill level: intermediate — radiating spacing takes a careful eye
Why this works: A radiating sunburst pattern draws the eye upward and outward, which makes a smaller bedroom feel taller and wider than a rectangular headboard of the same size would.
A sunburst pattern does something most rectangular headboards can’t — it draws the eye upward and outward from a single point, which makes the wall feel taller and the room feel wider than the actual dimensions suggest. I used a half-moon shape rather than a full circle so the piece sits naturally behind the pillows without floating oddly above the bed. Rattan needs to be soaked until genuinely pliable before bending; rushing this step is the most common reason DIY rattan pieces crack or snap partway through.
Brass tacks along the outer curve aren’t just decorative — they’re what keeps the rattan ends secure over time, since glue alone tends to loosen as the reed dries and contracts slightly. This build brings genuine texture and dimension to a wall without the weight or cost of a fully upholstered piece, and the natural rattan tone works particularly well against warm neutral or deep green walls, where the contrast lets every individual strand read clearly rather than blending into the background.
22. Mosaic Tile Accent Frame
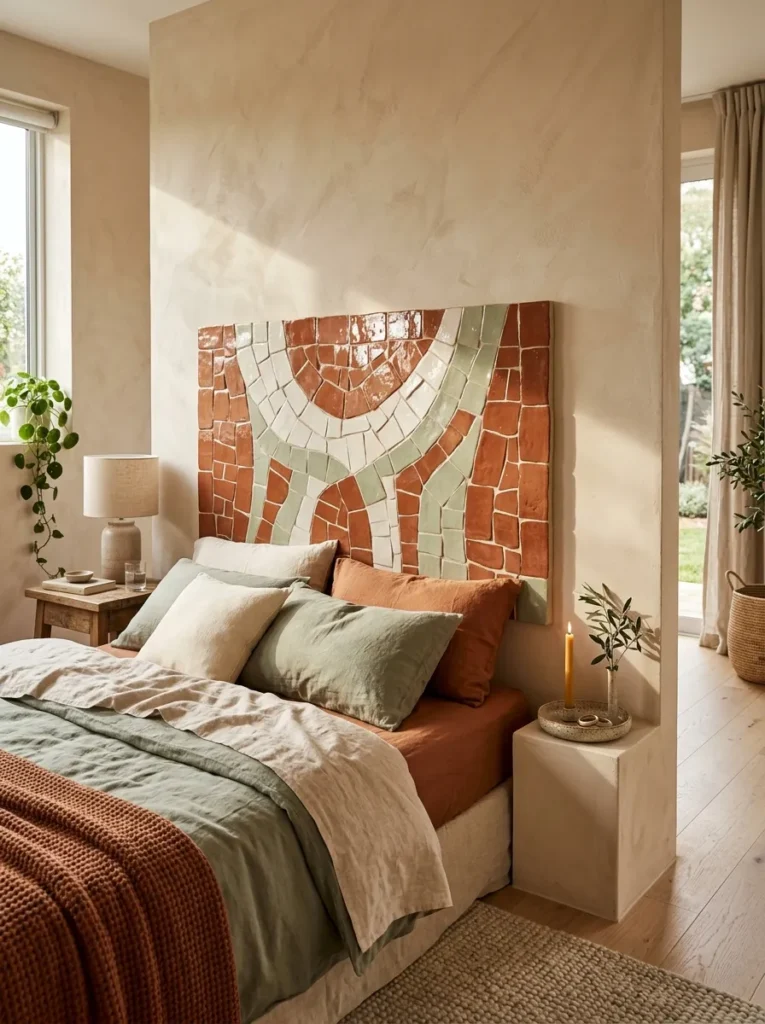
- Materials: 1/2-inch plywood base, handmade ceramic mosaic tiles (mixed glazed finishes in terracotta, cream, and sage), tile adhesive, unsanded grout in warm white, grout sealer
- Dimensions: 58″ wide x 42″ tall for queen
- Tools needed: notched trowel, tile nippers, grout float, sponge, level
- Construction steps: seal and prime the plywood base, plan the tile layout loosely before adhering, spread adhesive in small sections and press tiles into an organic, irregular pattern rather than a rigid grid, let cure fully, apply grout between tiles, wipe clean and seal once dry
- Cost & time: $150-$190, multi-day project given adhesive and grout curing time between steps
- Mounting: wall-mounted with a French cleat into studs, given the added weight of tile and grout
- Skill level: advanced — tile work rewards patience over speed
Why this works: An irregular, hand-set tile pattern reads as artisanal rather than manufactured, which is the detail that separates this from a bathroom-style tiled surface.
Tile isn’t a material most people think to bring into a bedroom, but that’s exactly what makes it stand out here — it has weight, texture, and a glazed shine that fabric and wood simply don’t offer. I deliberately avoided a perfect grid layout, since a slightly irregular, hand-set pattern with varied tile shapes reads as artisanal rather than something pulled straight from a bathroom renovation. Mixing two or three glazed finishes within the same warm color family — terracotta, cream, sage — keeps the pattern feeling cohesive rather than chaotic, even without a repeating design.
Grout color matters more than people expect on a project like this; a warm white grout softens the transitions between tiles, while a stark white can make the whole panel feel clinical instead of warm. This headboard catches and reflects light differently than any other build in this list, since the glazed tile surface has genuine shine that shifts as you move around the room. It’s a heavier, more permanent-feeling piece, which makes it best suited to a primary bedroom meant to stay put for years.
23. Curved Upholstered Bolster Wall
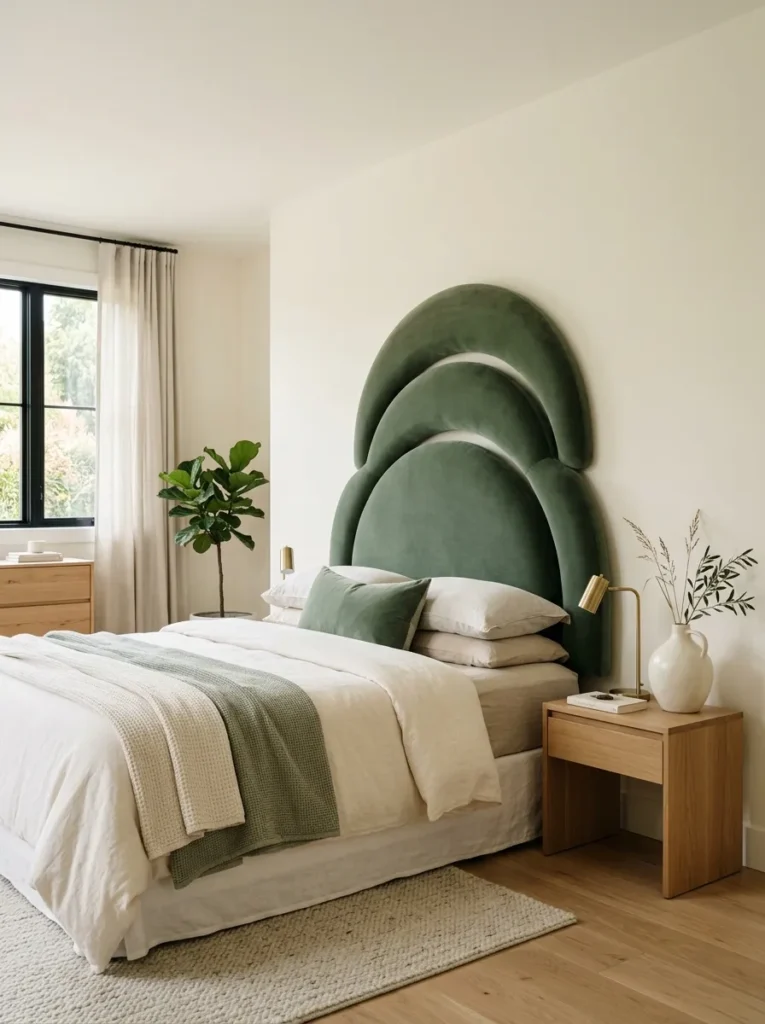
- Materials: 3/4-inch plywood base cut into three connecting curved bolster shapes, high-density foam cylinders, quilt batting, performance velvet in deep sage, heavy-duty staples, French cleat hardware
- Dimensions: 62″ wide x 46″ tall for queen, three overlapping curved bolster forms
- Tools needed: jigsaw, staple gun, fabric scissors, drill, clamps
- Construction steps: cut plywood into three curved, overlapping bolster silhouettes of varying heights, wrap each in foam and batting, upholster each bolster shape individually in performance velvet, join the three sections together on a shared backing board, attach cleat hardware
- Cost & time: $170-$210, one full weekend given individual bolster upholstery time
- Mounting: wall-mounted with a French cleat into studs
- Skill level: advanced — upholstering curved surfaces takes more precision than flat panels
Why this works: Overlapping curved bolster shapes of varying heights create a sculptural silhouette that reads as organic modern design rather than a flat, traditional upholstered rectangle.
Curved upholstery is genuinely harder than flat paneling, since fabric wants to pull and pucker around a rounded edge instead of lying flat. The trick is wrapping each bolster section individually before joining them, rather than trying to upholster the whole connected shape at once — it’s far easier to control tension and puckering on a smaller curved surface. Performance velvet holds up better than standard velvet against everyday contact with pillows and shoulders, and it resists crushing in a way that cheaper velvet blends don’t over time.
Three overlapping bolster shapes at varying heights create a soft, undulating silhouette against the wall, which feels distinctly different from the single rectangular block most upholstered headboards default to. Deep sage against a warm white or cream wall lets the curved shapes cast their own soft shadows, adding dimension that a flat panel can’t replicate. This build leans fully into current organic-modern styling, and it works especially well as the singular statement piece in an otherwise simple, uncluttered bedroom.
24. Live Edge Slab Headboard
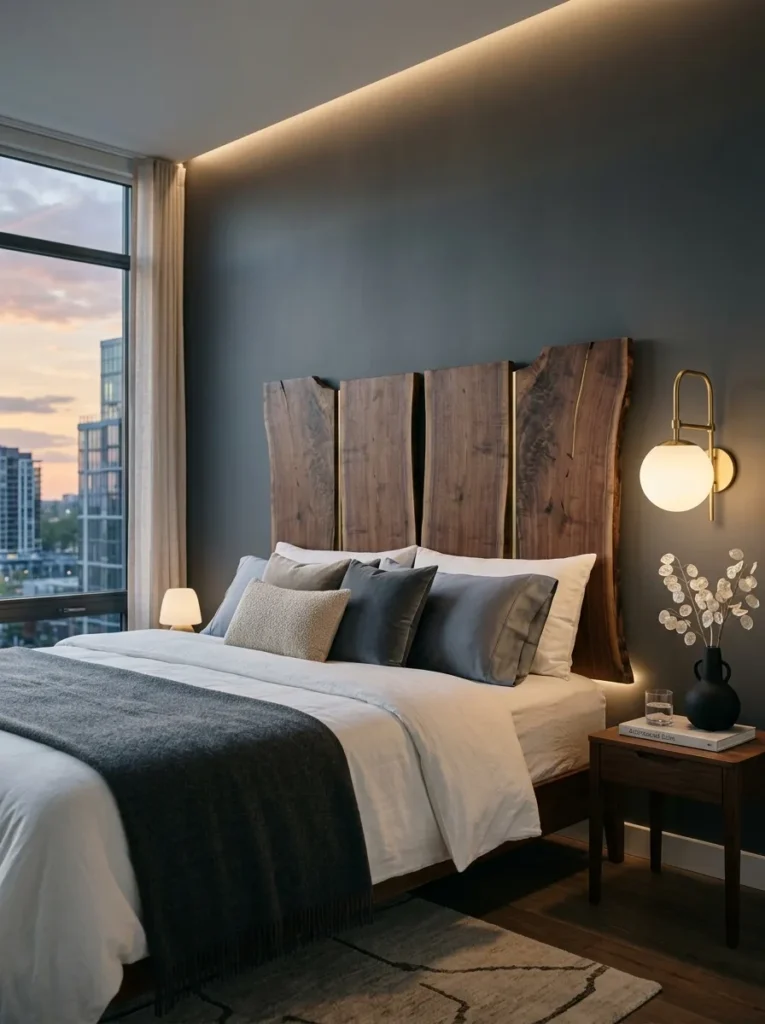
- Materials: single live edge walnut or maple slab, steel L-brackets, wood conditioner, matte tung oil finish, felt pads
- Dimensions: 60″-70″ wide (varies by natural slab shape) x 40″-48″ tall
- Tools needed: orbital sander, drill, level, stud finder
- Construction steps: sand the slab progressively through fine grits to smooth the surface while preserving the natural bark edge, condition and oil the wood to deepen the grain, attach steel L-brackets to the back near stud locations, mount directly to the wall
- Cost & time: $200-$280 depending on slab size and species, one full weekend including oil curing time
- Mounting: wall-mounted with steel brackets into studs — the natural slab is heavy and needs full stud support, not a single anchor point
- Skill level: intermediate — sanding is time-intensive but the mounting itself is straightforward
Why this works: A single live edge slab is one of the few headboard materials where no two builds can ever look identical, since the natural grain and bark edge are unique to that specific piece of wood.
There’s something genuinely different about a live edge slab compared to every other build in this list — no two will ever look the same, because the natural grain, knots, and bark edge are unique to that individual tree. My husband sources slabs occasionally from local sawmills for client projects, and the ones with visible grain variation or a small natural void filled with clear epoxy tend to be the most requested. Sanding through progressively finer grits is what brings out the depth of the grain; skipping steps leaves the surface looking dull instead of rich.
Because a full slab this size can weigh 40 to 60 pounds depending on the wood species, this is one build where stud placement genuinely can’t be approximate — steel brackets need to hit solid framing, not just drywall anchors, or the slab will eventually pull loose under its own weight. Left with a natural matte oil finish rather than a glossy lacquer, the wood grain stays the visual focus rather than competing with reflected light. It’s a striking, one-of-a-kind piece that ages beautifully with time.
Styling Principles for DIY Headboards
Choose the bedding and lighting after the headboard’s silhouette, material, and color have been established. A sculptural or strongly colored headboard usually works best when the surrounding furniture stays restrained. For textured materials such as cane, rope, fluting, and live-edge wood, give the surface enough visual space to remain the focal point.
Pay attention to scale as carefully as you do to finish. A 60-inch-wide queen mattress does not automatically mean the headboard should also be 60 inches wide. Wider panels can visually anchor the bed, while taller silhouettes can draw the eye upward and make the room feel more architectural.
Mounting should always be treated as part of the design rather than an afterthought. Locate studs before installing heavy wall-mounted builds, use appropriate structural hardware, and follow the manufacturer’s instructions for any specialized materials or finishes. Freestanding designs still need stable legs and secure connections so they cannot shift during normal use.
Conclusion
The best DIY headboard ideas are the ones that solve a real bedroom need while giving you a finish you cannot easily find in a standard store-bought piece. Whether you prefer upholstered channels, dramatic painted plywood, natural cane, reclaimed wood, woven leather, sculptural plaster, or a live-edge slab, the right build can completely change the proportions and personality of the room.
Start with the silhouette and the available wall space, then choose materials, mounting, and styling that support it. A carefully measured panel with secure hardware will always look more custom than an expensive headboard that is simply the wrong size for the room.
FAQs
1. How much does it cost to build a DIY headboard?
Many of these projects fall between roughly $60 and $280 in materials, depending on the wood, upholstery, hardware, and finish. Simpler plywood designs tend to cost less, while live-edge wood, leather, tile, and specialty upholstery can increase the budget.
2. What is the easiest DIY headboard to build?
The scalloped silhouette panel and arched cane panel are among the more beginner-friendly options. Both rely on relatively simple cutting and finishing rather than complicated joinery or upholstery.
3. How do I securely mount a DIY headboard?
For heavier wall-mounted headboards, locate wall studs and use an appropriate French cleat or structural mounting hardware. The mounting method should be selected according to the finished weight and construction of the headboard.
4. Can I make a DIY headboard for a queen bed?
Yes. Most of the designs in this collection are sized specifically for queen beds, with dimensions ranging from approximately 58 to 84 inches wide. You can adjust the width and height to suit your mattress and wall.
5. Is a wall-mounted or freestanding headboard better?
It depends on your bedroom and the project. Wall-mounted headboards save floor space and can feel architectural, while freestanding designs are useful for renters or anyone who wants to move the headboard later.
6. What materials work best for a DIY headboard?
Plywood, MDF, solid wood, cane, rattan, upholstery fabric, leather, and reclaimed wood can all work well. The best choice depends on the desired silhouette, budget, skill level, weight, and mounting method.