15 Solarpunk Home Design Ideas You Can Actually Build
Your house already catches sun, sheds rain, and holds heat. The question is whether any of it works for you.
These solarpunk home design ideas turn that wasted energy into shade, harvests, clean power, and neighbors who wave back. Each of the fifteen builds names its job, its materials, its cost, and its upkeep, so nothing is vague or purely decorative.
I’m a plant scientist by training, and my husband builds homes, so I’ve learned to ask two questions of every project: does it work, and can it be built safely? I’ve seen a $40 bee block change a garden’s harvest, and I’ve watched one vine-covered arch make a west porch livable in August. Whether you rent or own, you’ll find a place to start. Save this post, pick one idea, and begin with the spot that bothers you most.
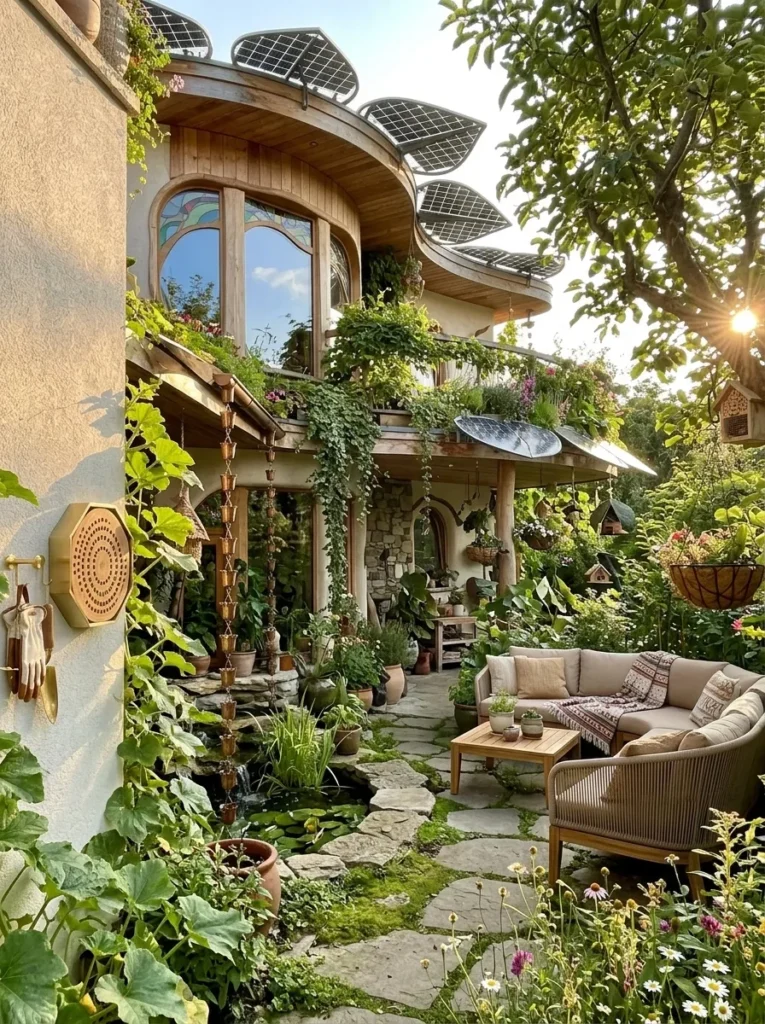
Plants alone do not make a home solarpunk. Solarpunk architecture emerged online in the late 2000s and early 2010s as an optimistic answer to cyberpunk, and its practical core is a simple test. A solarpunk element is any feature on a home that shades, cools, captures water, grows food, generates energy, or brings neighbors together; if it does none of those jobs, it is just styling. My husband builds homes, and when he looks at a vine-covered wall he asks two questions: what is it protecting, and what is it costing to maintain? That habit is the whole movement at house scale. Here are fifteen buildable ideas, each with its job, materials, cost, and upkeep named, so you can build it yourself or know exactly who to hire.
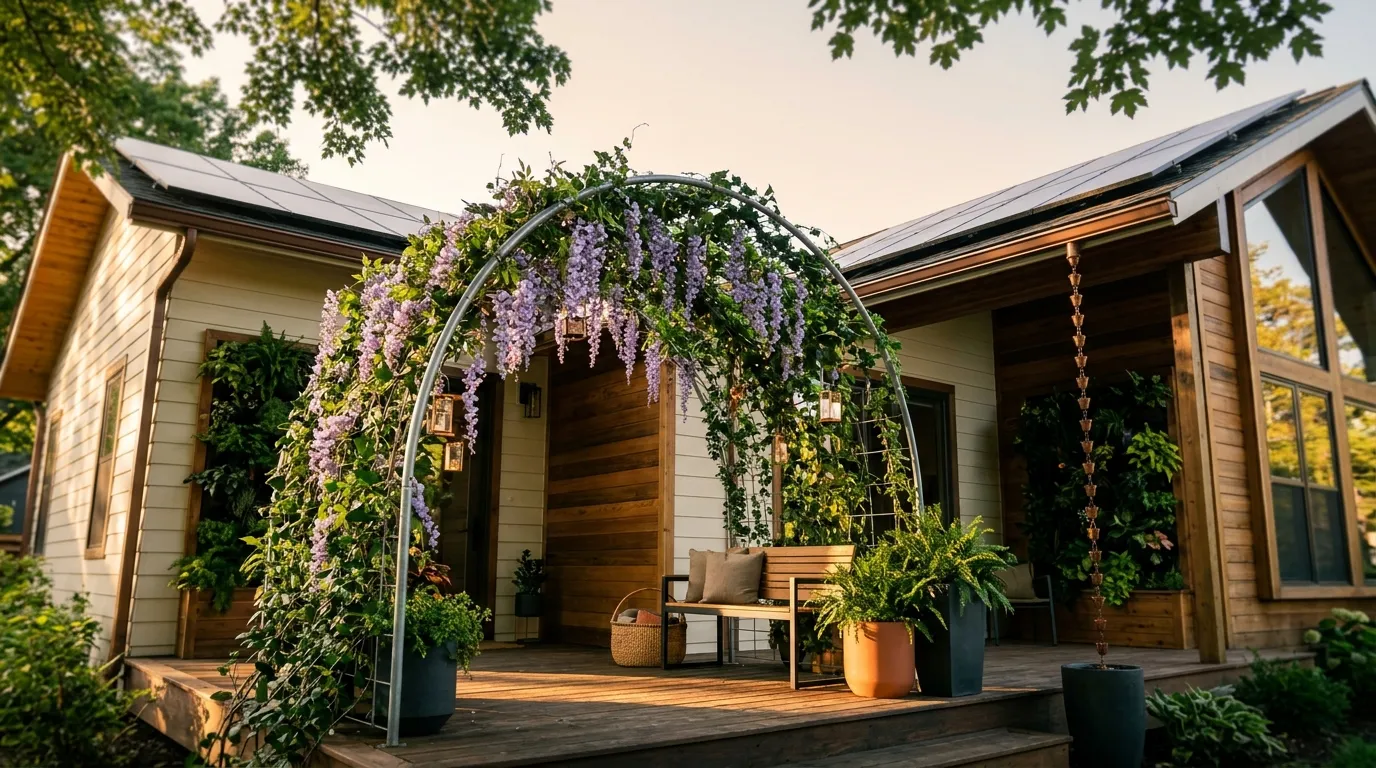
1. Cattle Panel Porch Arch — A Solarpunk Home Design Idea

- Access level: Owner-Build
- The job: Shades a west-facing porch from the hottest late-day sun, then lets winter light back in once the leaves drop
- The build and cost: Two 16-foot cattle panels bent into an arch about 8 feet wide, bolted to four 4×4 pressure-treated posts set in concrete, placed 3 feet off the porch edge; roughly $350–$550 including the plant
- Plants: American wisteria (Wisteria frutescens) ‘Amethyst Falls’, full sun, zones 5–9; deciduous, so it leafs out as heat builds and sheds leaves when you want sun
- Design language: One sweeping curve instead of a boxy frame, with shoots tied along the wire in loose S-curves
- Skill and time: Intermediate; one weekend for the frame, two to three seasons for full bloom
- Maintenance and safety: Prune right after bloom; set post depth for your frost line; mature wisteria is heavy, so confirm HOA and local rules before digging
- Standout detail: Hand-bent rebar scrolls at each post base echo Art Nouveau whiplash curves and double as plant ties
Why this works: A deciduous vine on a freestanding arch blocks summer sun and admits winter sun, doing seasonally what a fixed awning cannot.
Afternoon sun is the hardest to manage on a porch, because it arrives low, hot, and straight through every gap. A deciduous vine on an arch solves that with biology instead of hardware. Wisteria leafs out as spring warms, builds a full canopy by midsummer, then drops its leaves in autumn so low winter sun reaches the porch floor. Fixed awnings cannot adjust like that. My husband insists on one rule: never let the vine touch the siding, because trapped moisture causes rot and invites termites. A freestanding arch set three feet off the porch edge keeps it clear.
Expect patience. Wisteria grown from a one-gallon plant usually takes two to three seasons to bloom well, so plant it the same weekend you build. Meanwhile, the bare wire already reads as a sculptural curve against the sky. Underneath, a cedar bench and a harvest basket turn the shade into a place people actually sit. In Austin, I’ve watched a west porch drop from unbearable at five o’clock to comfortable by the second summer. Prune right after bloom, tie new shoots in loose S-curves, and check your HOA rules and call 811 before digging.
2. Hyacinth Bean Window Screen
- Access level: Renter-Friendly
- The job: Shades a west or south window from the outside, stopping heat before it reaches the glass
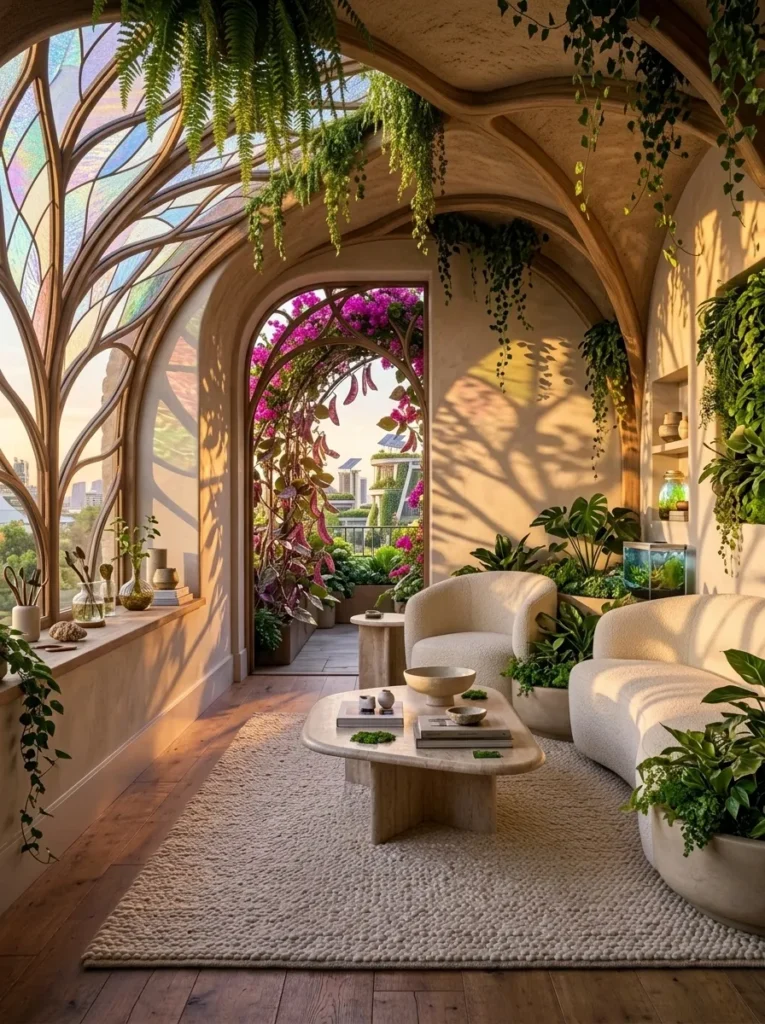
- The build and cost: Two 20-inch planters on locking casters, a 4×6-foot cedar lattice panel, and two 8-foot lengths of ½-inch EMT conduit bent into a curved crest with a hand bender; about $140–$220 with soil
- Plants: Hyacinth bean (Lablab purpureus), full sun, grown as an annual in most zones; sow after the last frost for 10–15 feet of growth in one season
- Design language: A matte-black conduit crest curving above the lattice, with purple stems and magenta flowers softening the lines
- Skill and time: Beginner; about two hours to assemble, six to eight weeks to fill
- Maintenance and safety: Water daily in peak summer because containers dry fast; weigh down or anchor the frame against wind; raw seeds and pods are toxic, so keep away from pets and kids
- Standout detail: The bent-conduit crest turns a utilitarian trellis into a graceful silhouette
Why this works: Shading a window from the outside stops solar heat before it enters the room, which interior curtains cannot do.
My first west-facing Austin apartment taught me an expensive lesson. I hung heavy blackout curtains, and the room stayed hot, because the glass had already soaked up the sun. Exterior shading works differently: it stops sunlight before it reaches the window, and the Department of Energy credits it with cutting solar heat gain by well over half. So the next summer I built this screen on the balcony in front of that window, and I never needed the curtains again. The glass stayed cool to the touch even in August, and I still got filtered afternoon light.
Hyacinth bean is the right plant for this job. It grows as an annual in most zones, so it leaves nothing behind when your lease ends, and it climbs ten to fifteen feet in a single season. Sow seeds after your last frost, and keep the soil moist, because container roots dry out fast. The curved conduit crest turns a utilitarian trellis into a graceful silhouette. One caution: raw seeds and pods are toxic, so keep them away from pets and children. Also keep the screen movable, since bedroom windows must stay usable as emergency exits.
3. Living Roof Garden Shed
- Access level: Pro-Install for the roof structure and waterproofing; you plant it yourself
- The job: Keeps the shed cooler and holds rainfall that would otherwise run straight off the roof
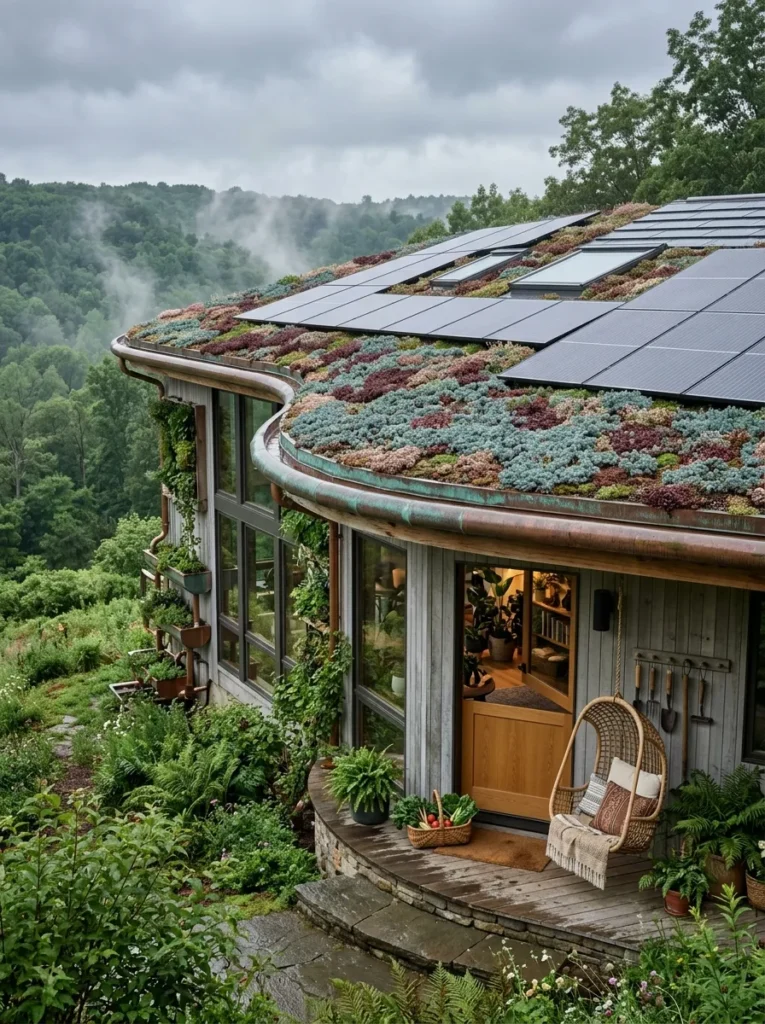
- The build and cost: 8×10-foot shed (about 80 square feet of roof) with rafters sized by a builder or engineer, EPDM or TPO membrane, root barrier, drainage mat, and 3–4 inches of lightweight media in modular trays; roughly $1,200–$2,400 for the green layers, plus the shed
- Plants: Sedum album, Sedum ‘Dragon’s Blood’, and Texas rock pink (Phemeranthus calycinus), full sun; hardy through roughly zones 5–9, so check each variety for your zone
- Design language: A softly pitched roof edged with a rounded, scalloped copper drip edge, so it reads as a meadow, not a flat tray
- Skill and time: Pro for structure and membrane (one to two days); a weekend to set trays; two to three months to knit together
- Maintenance and safety: Get an engineer’s or shed builder’s sign-off on load (saturated roofs are commonly cited at 15–30 pounds per square foot); water weekly the first summer, weed twice a year, check seams yearly; confirm shed permit rules locally
- Standout detail: The copper drip edge develops a green verdigris patina that matches the sedum
Why this works: A living roof layers waterproofing, drainage, and plants so a small building stays cooler and holds rainfall that would otherwise run off.
A shed is the smartest place to try a living roof, because the stakes are low and the lessons carry over to a house. The roof is a layered sandwich. My husband walked me through it on a jobsite: structure, waterproof membrane, root barrier, drainage mat, then lightweight soil. Skip the root barrier and roots can find a seam. Skip the drainage mat and the soil stays soggy against the membrane. Each layer has one job, and a failure in one eventually shows up as a leak. Pay for a pro on the waterproofing.
Here is the plant science I love: sedums use CAM photosynthesis, opening their pores at night instead of midday, which lets them lose far less water on a hot roof. That is why a three-to-four-inch bed of lightweight media can survive Texas July with weekly watering in the first summer. Up close, the roof reads as a soft meadow of gray-green, burgundy, and pale pink, and the shed’s interior stays noticeably cooler in summer. Confirm the load with an engineer first, because a saturated green roof is far heavier than shingles, and check permit rules for sheds.
4. Limestone Keyhole Garden
- Access level: Owner-Build
- The job: Grows a kitchen’s worth of greens and beans in a small circle while a central compost basket feeds the soil
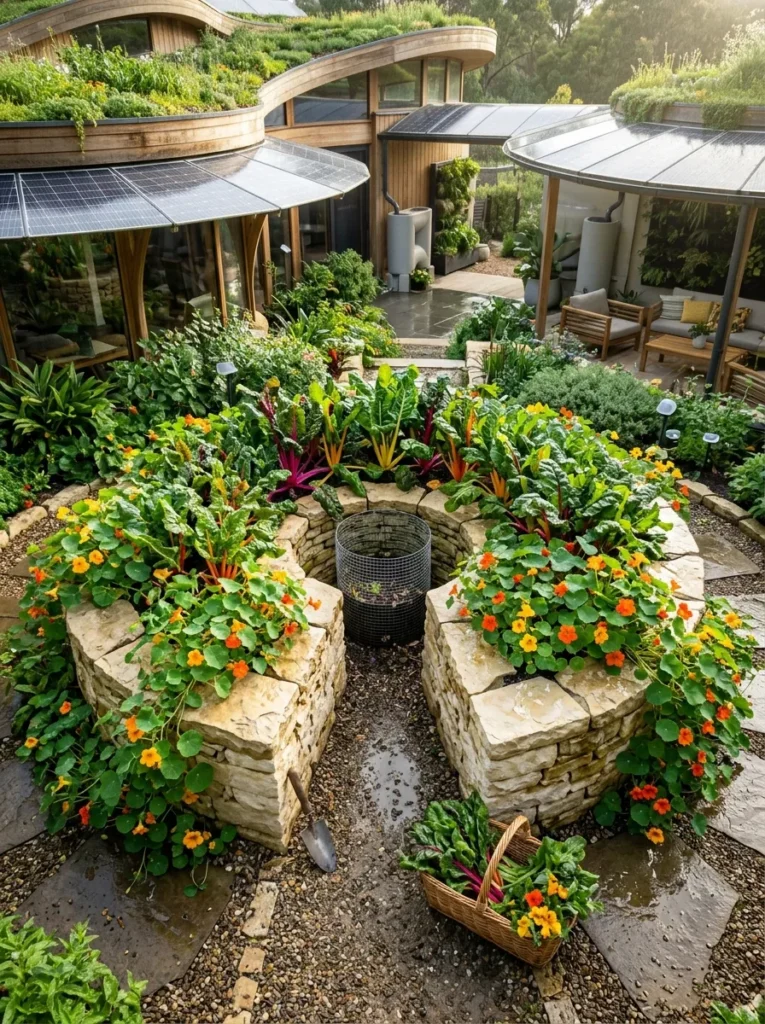
- The build and cost: Dry-stacked local limestone ring 6 feet across and 30 inches tall on a 4-inch compacted gravel base, filled with topsoil and compost, with a 12-inch wire-mesh basket at the center and a 2-foot wedge path; about $400–$900 depending on stone (verify locally)
- Plants: ‘Bright Lights’ Swiss chard, bush beans, and nasturtium (Tropaeolum majus); six or more hours of sun; chard and nasturtium handle Austin’s cool season
- Design language: A rounded ring with a keyhole notch, like a sundial set into the yard
- Skill and time: Intermediate; one weekend for the wall, one afternoon to fill and plant
- Maintenance and safety: Feed the basket fruit and vegetable trimmings only, no meat or dairy; keep the wall at or under 30 inches, since taller retaining walls can require engineered design
- Standout detail: Nasturtiums spill orange, edible blossoms over the pale stone lip
Why this works: A keyhole bed puts every plant within arm’s reach of a central compost basket, so kitchen scraps become fertilizer without turning the soil.
I once built a straight raised bed and spent half of every season stretching across it to reach the middle. Then I met the keyhole garden, a circle with a notch cut in so you can stand in the center. Everything sits within an arm’s length. The compost basket in the middle works like a slow fertilizer tap: each time you water, nutrients leach outward into the roots. I tried it with local limestone, and the stone soaks up daytime heat and releases it at night, which helps in cool Austin springs.
The plant pairing does real work. Beans host rhizobia bacteria in root nodules that convert nitrogen from the air into a form plants can use, so the chard beside them grows greener. Nasturtium acts as a trap crop, drawing aphids away from your food. Plant chard and nasturtium in fall for a winter harvest in mild zones, and add beans after the last frost. Fill the bed with equal parts topsoil and finished compost, and keep scraps to fruit and vegetable trimmings only. Keep the wall low, because tall stacked stone can need an engineer.
5. Solar Canopy Pergola
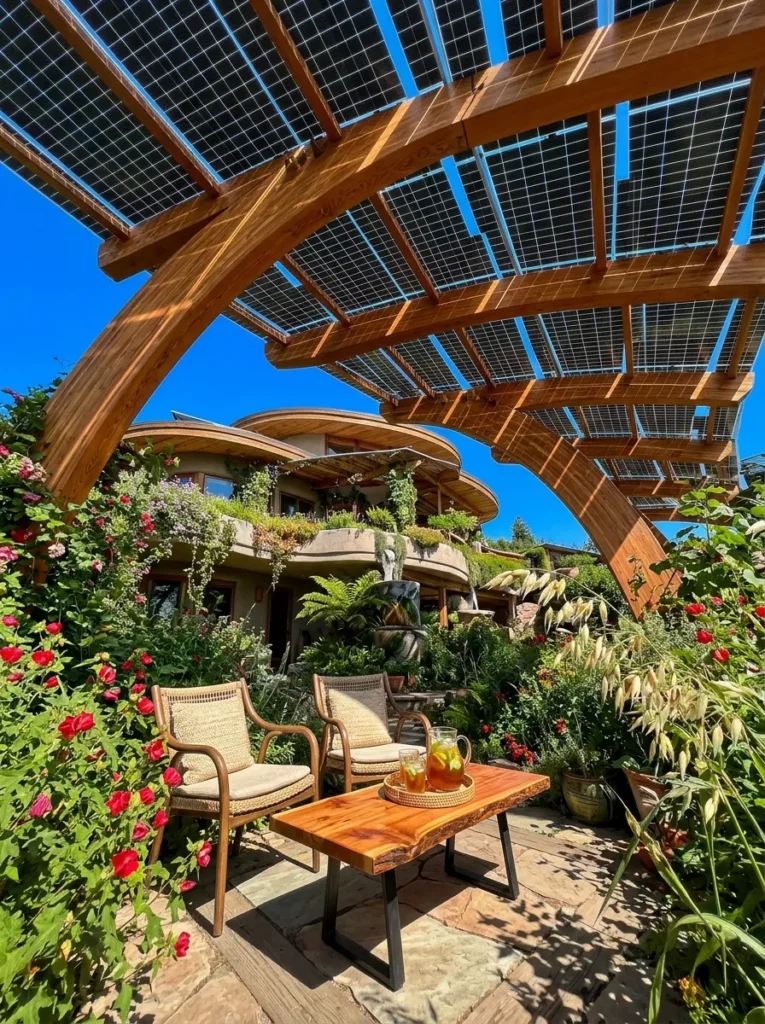
- Access level: Pro-Install
- The job: Generates electricity and shades a patio at the same time
- The build and cost: 10×12-foot steel-and-cedar pergola on engineered footings, carrying four roof-mounted panels (about 1.6 kilowatts) with microinverters; expect several thousand dollars, often $4,000–$9,000, so get local quotes
- Plants: Understory of Turk’s cap (Malvaviscus arboreus var. drummondii), part shade, zones 7–10, and inland sea oats (Chasmanthium latifolium), zones 3–9
- Energy and permits: Licensed electrician, building and electrical permits, and utility interconnection approval; never DIY the wiring
- Design language: Arched cedar rafters in a shallow curve beneath slim dark panels, so the canopy reads as a leaf, not a box
- Skill and time: Pro-Install; one to two days on site, but permits can take weeks
- Maintenance and safety: Rinse panels seasonally, inspect connectors yearly, and confirm wind-uplift ratings for the frame and footings
- Standout detail: Rafters spaced to leave 2-inch gaps between panels, so dappled light still reaches the plants below
Why this works: Raising solar panels on a pergola frame leaves airflow beneath them, and cooler panels produce more electricity than hot ones.
A pergola is the perfect host for solar because it already has a roof, a frame, and a reason to exist. Panels lose efficiency as they heat up, and an open pergola lets air move beneath them, which keeps them cooler than panels sitting flat on a shingle roof. Overhang depth matters too. My husband sizes pergola roofs so that the high summer sun is blocked while the lower winter sun still slides under the edge, and that geometry is the same whether the roof carries leaves or panels. Aim the panels south for the best yearly output.
Under the canopy, plant for shade that is bright, not dark. Turk’s cap is a Texas native that blooms through summer heat and feeds hummingbirds, and inland sea oats add arching seed heads that glow when the light comes through the gaps. At dusk, small solar lanterns on the posts extend the evening. Keep one rule firm: the panels, wiring, and utility connection belong to a licensed electrician, with permits pulled before anything is bolted down. Ask whether your roof framing and footings are rated for wind uplift, because panels act like sails, and ask for a stamped plan.
You’ll Also Love: 15 Covered Patio Design Ideas for Stylish Outdoor Living
6. Breezeway Screen Door
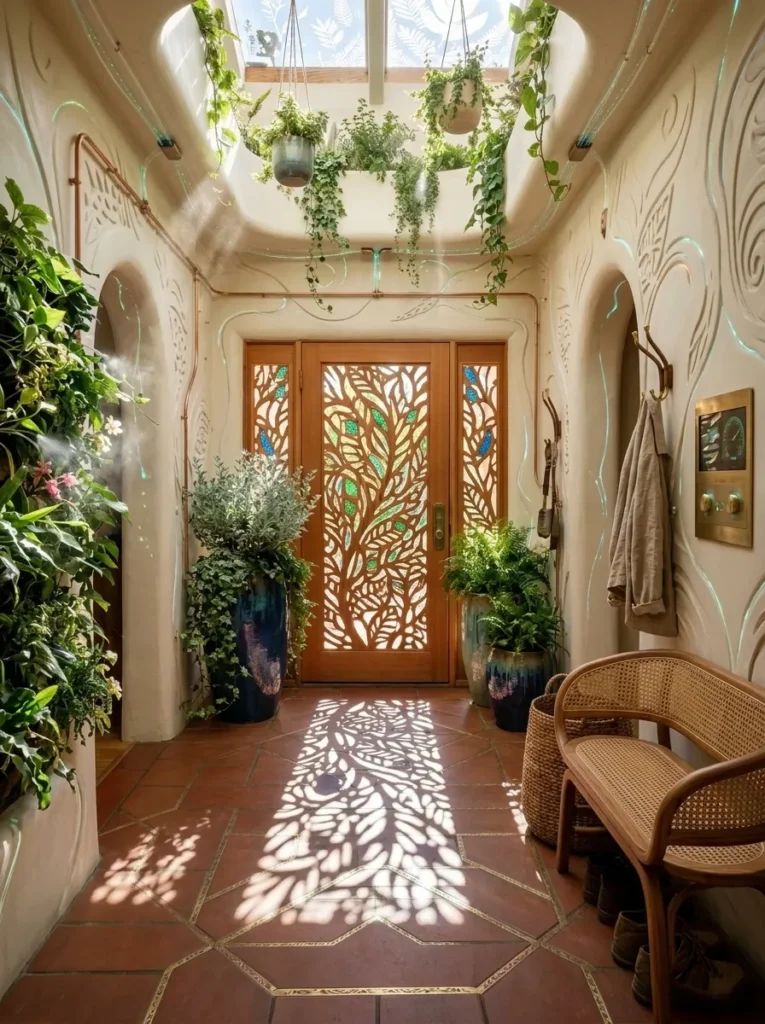
- Access level: Owner-Build
- The job: Opens the entry to a cross-breeze, venting hot air without letting bugs in; it works only if a window on the opposite or an adjacent wall is open as the exit
- The build and cost: 36-inch cedar-frame door with an arched top rail, bronze fiberglass mesh, and a leaf-cut cedar panel at the bottom; about $250–$450 in materials (verify local lumber prices)
- Plants: Two planters of Texas sage (Leucophyllum frutescens), full sun, zones 8–10; dense silver leaf hairs reflect sunlight and cut water loss
- Design language: An arched top and a cut leaf motif in an Art Nouveau spirit, so the door reads like a garden gate
- Skill and time: Intermediate carpentry; one weekend
- Maintenance and safety: Seal cedar yearly; use a latch that opens from inside without a key; lock the main door whenever the house is empty
- Standout detail: The leaf-cut panel throws patterned shadows across the hall floor as the sun moves
Why this works: Moving air needs both an entry point and an exit, so a screened front door paired with an open back window ventilates a house with no electricity.
Cracking the front door open for air sounds simple, but it only works if the breeze has somewhere to go. My husband places windows by thinking in lines: air needs an inlet on one side of the house and an outlet on the opposite or an adjacent wall, and the stronger the line, the faster the house exhales. A screen door on the front, an open window at the back, and suddenly the hallway moves like a river. On mild Austin evenings, I’ve seen this let families switch off the air conditioner for hours.
Plants do quiet work at the threshold. Texas sage has dense silver hairs on its leaves that reflect sunlight and cut water loss, which is why it thrives in a pot beside a hot, bright door. After rain, it throws purple blooms along its stems. The arched frame and leaf-cut panel make the door look like a garden gate, and the cut shapes scatter patterned shadows across the hall floor as the sun moves. Use a latch that opens from inside without a key, and close and lock the main door whenever the house is empty.
7. Frogfruit Flagstone Courtyard
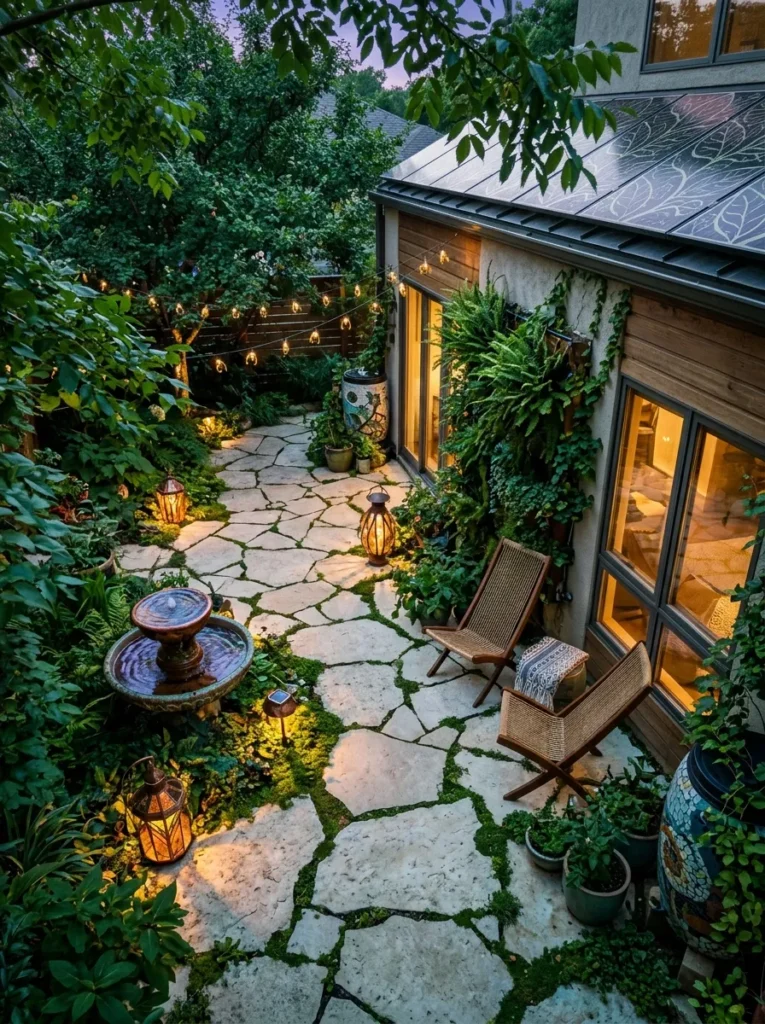
- Access level: Owner-Build
- The job: Cools a courtyard floor and lets rain soak into the ground instead of running off a hot slab
- The build and cost: 12×12-foot courtyard of irregular limestone flagstone, about 2 inches thick, set on 4 inches of compacted gravel with 1–2-inch open joints; roughly $1,000–$2,200 in materials (verify local stone prices)
- Plants: Frogfruit (Phyla nodiflora) in the joints, sun to part shade, zones 5–10; one Mexican plum (Prunus mexicana) in a corner, zones 6–9
- Energy and water: Four small solar lanterns for evenings (no wiring); slope the base about ¼ inch per foot away from the house
- Design language: Rounded, organic stone shapes and a leaf-shaped curved edge instead of a square slab
- Skill and time: Intermediate; two to three weekends, with base prep the hardest part
- Maintenance and safety: Hand-weed the joints twice a year, call 811 before digging, and check local rules on paved surface limits
- Standout detail: A ceramic bird bowl that doubles as a tiny water source for pollinators
Why this works: Open-jointed stone on gravel lets rain soak in and stays cooler than solid concrete, because plants in the joints cool the surface through evaporation.
Concrete patios look tidy but behave like frying pans. Dark, dense paving soaks up sun all day and radiates it back after sunset, which is why a concrete courtyard stays warm long after the air cools. Irregular limestone flagstones set on gravel with open, planted joints behave differently: rain soaks through, and living plants in the joints cool the surface through evaporation. Slope the base about a quarter inch per foot away from the house so water never pools against the foundation. Keep the joints one to two inches wide, wide enough for roots and narrow enough for heels.
The planting is where this courtyard earns its keep. Frogfruit is a Texas native that tolerates footsteps, flowers for months, and feeds butterflies, so the joints become a living, low carpet in green and white. In one corner, a Mexican plum casts dappled shade and blooms before it leafs out in early spring. For evenings, stake four small solar lanterns around the edge; they need no wiring. Fold two chairs against the wall and set out a ceramic water bowl for birds. For deeper stormwater details, see our Gutter Downspout Drainage guide.
8. Winter Sun Lemon Nook
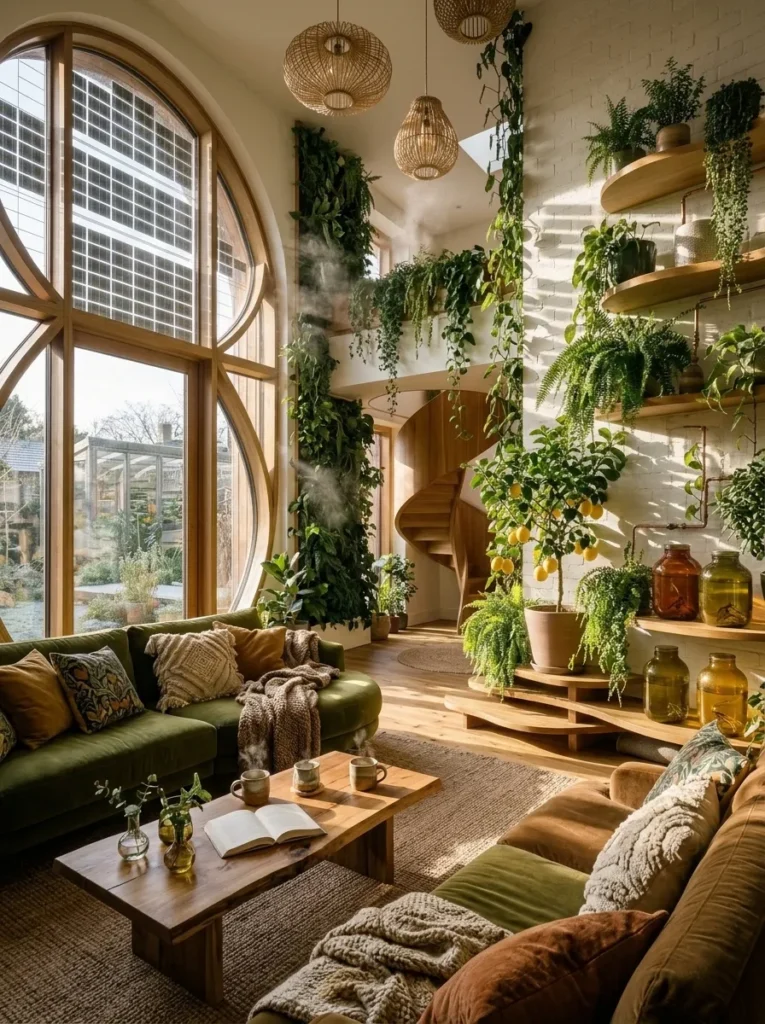
- Access level: Renter-Friendly
- The job: Captures low winter sun in water jars that release heat after dark, and shelters a citrus tree and cuttings by a south-facing window
- The build and cost: 36-inch freestanding oak ladder shelf with three 10-inch tiers, four clear 1-quart glass jars of water, a 15-inch glazed pot on a rolling caddy, and a plug-in LED grow strip; about $250–$450 with the lemon
- Plants: Meyer lemon (Citrus × meyeri), 8+ hours of bright light, outdoor zones 9–11; jade plant (Crassula ovata) on the middle tier
- Design language: Rounded oak edges and round glass jars, so the shelf reads as one soft, stepped curve
- Skill and time: Beginner; one afternoon
- Maintenance and safety: Use waterproof saucers, wipe window condensation, and use an anti-tip strap if you can, since wet pots are heavy
- Standout detail: The jars catch the low sun and glow like lanterns across the floor
Why this works: Water jars behind south-facing glass absorb winter sun by day and release that heat slowly at night.
Last winter, the sunniest seat in our house was not a chair. It was the floor in front of the south window, where a patch of warm light landed by ten a.m. That is passive solar in action: low winter sun streams through south glass and warms whatever it lands on. Water is the best thing to catch it, because it stores more heat than wood or stone for the same volume. So I lined four clear jars of water along the shelf, and the nook held its warmth into the evening.
The nook is a working greenhouse in miniature. A Meyer lemon in a fifteen-inch glazed pot sits on the floor, a jade plant on the middle tier, and a row of rooted cuttings in water on the top. A small plug-in LED grow strip adds light on short, gray days. Moisture is the risk, not the reward. Set every pot on a waterproof saucer, wipe window condensation, and never let a damp tray rest on wood, because trapped moisture feeds mold. Meyer lemons tolerate only light frost, so keep this one away from cold drafts.
9. Sun Tube Fern Bath

- Access level: Pro-Install
- The job: Brings daylight into a windowless or dim bathroom, so you stop switching on lights at noon
- The build and cost: 10-inch tubular daylight kit with roof flashing, mirrored tube, and ceiling diffuser; roughly $400–$1,000 installed (verify local quotes)
- Plants: Boston fern (Nephrolepis exaltata ‘Bostoniensis’), medium to bright indirect light, so keep it within about 3 feet of the diffuser; hardy outdoors in zones 9–11
- Energy and permits: No wiring needed for the daylight itself; ask your town whether a roof opening needs a permit
- Design language: A round diffuser echoing a round mirror and a curved stone tub
- Skill and time: Pro-Install; half a day to one day
- Maintenance and safety: Licensed roofer for the flashing; run an exhaust fan for 20 minutes after showers; shelf plants only, no living wall
- Standout detail: The ceiling’s circle of light repeats in the mirror, so the room glows from two directions
Why this works: A tubular daylight device pipes sunlight into a windowless room, replacing electric light during daylight hours.
Windowless bathrooms burn electricity every morning, even at noon. A tubular daylight device fixes that by catching sun on a small roof dome and sending it down a mirrored tube to a ceiling diffuser. A 10-inch unit can light a small bathroom through most of the day without a single switch. The weak point is not the glass but the roof opening. My husband says leaks start at the flashing, so he never lets a crew improvise there: the curb must sit above the roof surface, and shingles must overlap the flashing correctly.
Bathrooms are humid, and humidity is a plant’s friend and a house’s enemy. Choose a Boston fern, which evolved under forest canopy and thrives in the soft, indirect glow a tube delivers. Set it on a shelf, not a living wall; wet wall cavities invite mold. Pair the tube with a quiet exhaust fan, run it twenty minutes after every shower, and wipe the tiles. A wooden stool with a folded cotton towel completes the scene. Hire a licensed roofer for the roof cut, and ask about permit requirements, since many towns require one for roof openings.
10. Espaliered Fig Fence

- Access level: Owner-Build
- The job: Turns a fence into a privacy screen that also grows fruit
- The build and cost: Existing 6-foot cedar fence, three tiers of 12-gauge galvanized wire 18 inches apart on eye bolts set in the posts, with 4-inch standoffs; about $150–$350 plus the tree
- Plants: ‘Celeste’ fig (Ficus carica), 6+ hours of sun on a south or west fence, zones 7–10; a flat canopy exposes more leaves to light
- Design language: Curved arms rising like a candelabra, not stiff right angles
- Skill and time: Beginner to intermediate; one afternoon to wire, one to two seasons to fruit and two to three to fill the wall
- Maintenance and safety: Prune in late winter and pinch shoots in summer; fig sap irritates skin, so wear gloves; use frost cloth in hard freezes; check HOA height rules and mount only on your side of the line
- Standout detail: Each tier is tied with strips of linen that rot away as the branches stiffen
Why this works: Training a fig flat against a south or west fence exposes more leaves to light while keeping fruit within arm’s reach.
My neighbor leaned over the fence last August and asked what I had done to the wall. All I had done was stop fighting a fig. Left alone, a fig becomes a sprawling shrub that wants twelve feet. Trained flat against a fence, it becomes a living screen barely a foot deep that gives privacy, fruit, and shade for the boards. The method is called espalier, and it works because a flat canopy exposes more leaves to light and keeps every fig within arm’s reach. I strung three wires, bent young branches into curved arms, and waited.
Care is simple but specific. Prune in late winter, then pinch new shoots in summer to keep the shape. Figs drop their leaves in winter, so you lose some privacy then; the bare, curved arms read as a drawing on the wall. Leave a four-inch gap behind the plant so air moves and boards dry after rain. Fig sap irritates skin, so wear gloves. In colder zones, drape frost cloth over the plant during hard freezes. Check your HOA’s fence rules and mount wires only to posts on your side of the property line.
11. Quilted Thermal Bedroom Window
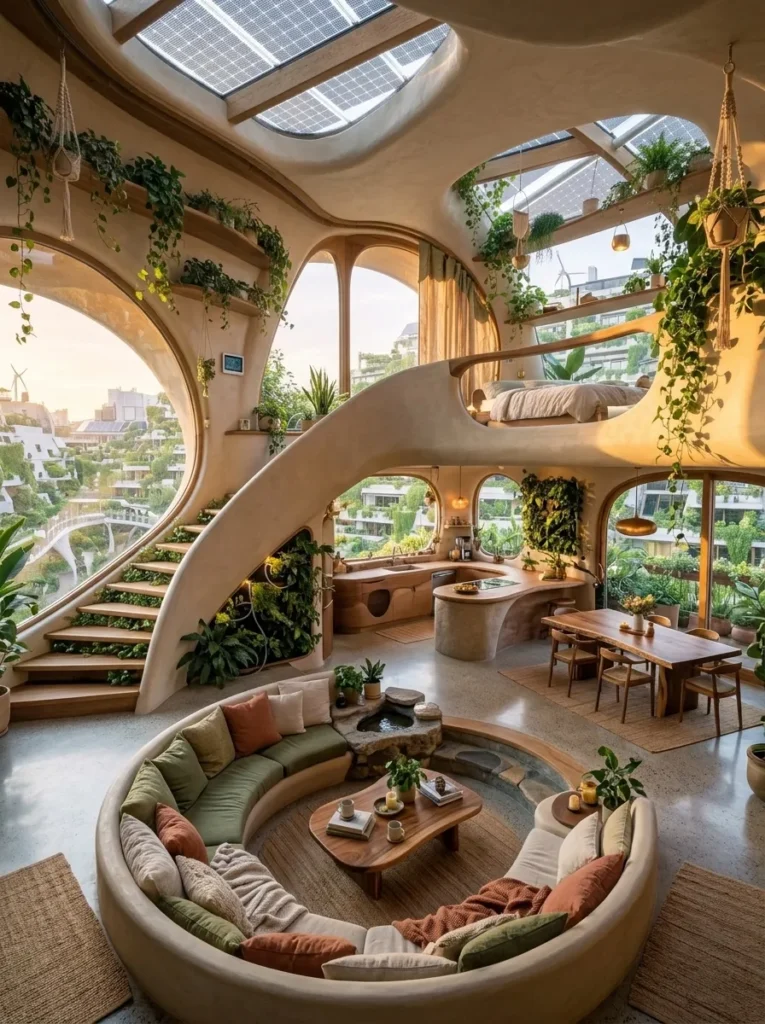
- Access level: Renter-Friendly
- The job: Insulates a bedroom window so the room holds cool air through summer afternoons and warmth on winter nights; in spring and fall, it also supports a night-flush routine
- The build and cost: Two 54 x 84-inch panels of cotton batting between linen-cotton layers, quilted in leaf shapes and hung on a rod 4 inches wider than the frame on each side; about $150–$350 if you sew them, more if made to order
- Plants: Snake plant (Dracaena trifasciata) on the sill, low to bright light, outdoor zones 9–11; mildly toxic to pets
- Design language: A scalloped top edge and leaf-shaped stitch lines instead of straight quilting rows
- Skill and time: Beginner to intermediate sewing; two weekends, or order custom
- Maintenance and safety: Use cordless operation, since looped cords are a strangulation risk for children and pets; keep fabric clear of space heaters; wash on a cool cycle; keep the window easy to open
- Standout detail: A 3-inch fabric return on each side seals the panel to the wall and traps an insulating air pocket
Why this works: Windows gain and lose far more heat per square foot than walls, so a sealed, insulated layer over the glass makes a bigger difference than its size suggests.
A guest once told me our bedroom felt like walking into a cave in August, and she meant it as a compliment. The room was cool because of the curtains, not just the air conditioner. Windows gain and lose far more heat per square foot than walls, so covering the glass pays back quickly. I sewed two quilted panels with cotton batting between linen layers, then added three-inch side returns that seal against the wall. That trapped air pocket does the insulating. Fix leaky frames with weatherstrip first, because no curtain cures a draft.
Night is the other half of the system. In spring and fall, open the windows after sunset, let cooler air flush the room, then close the glass and drop the curtains by morning. In midsummer, skip the flush and rely on the curtains. On the sill, a snake plant tolerates the dim, dry gap behind fabric, since it opens its pores at night and loses little water. Don’t expect plants to purify bedroom air, because the studies behind that claim used sealed chambers. Keep fabric clear of space heaters, and leave the window easy to open.
12. Barrel and Compost Station
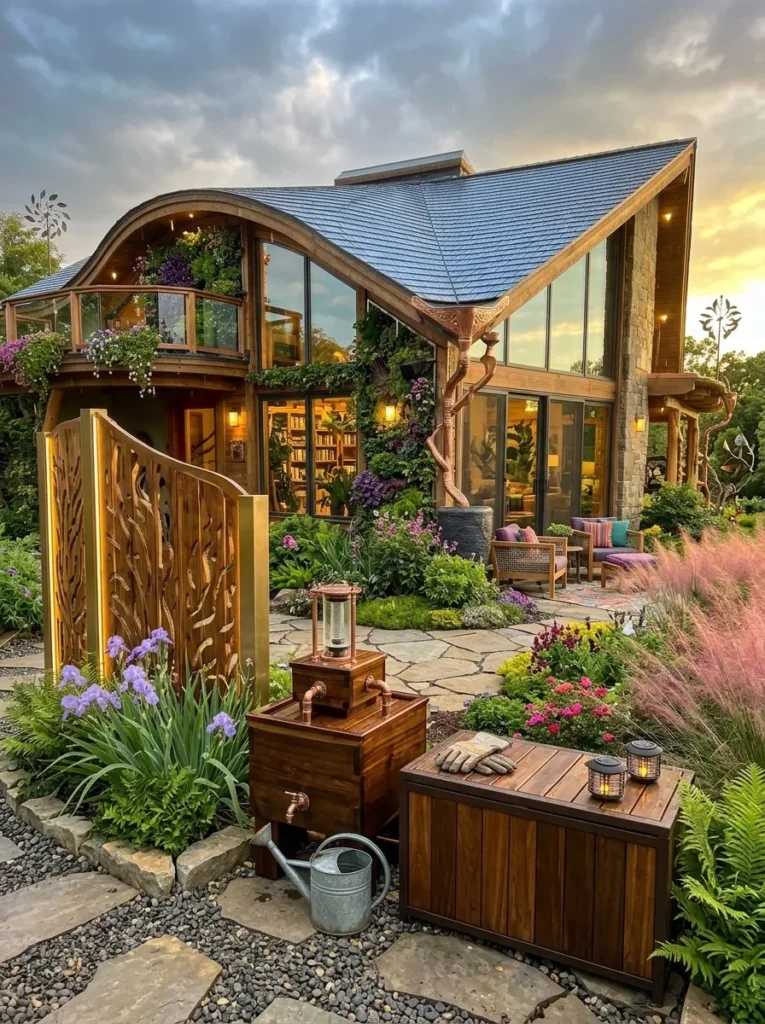
- Access level: Owner-Build
- The job: Captures roof rainwater for irrigation and turns kitchen and yard waste into compost in one tidy corner
- The build and cost: 55-gallon food-grade barrel on a level concrete-block stand with a brass spigot, first-flush diverter, and fine-mesh screen on every opening; a three-bay compost bin from heat-treated (HT-stamped) pallets, each bay about 3 feet square; roughly $250–$500
- Plants: Louisiana iris and Gulf Coast muhly (Muhlenbergia capillaris) at the overflow, full sun to part shade, roughly zones 6–9; both tolerate periodic wet feet
- Design language: A curved cedar screen with a scalloped top hides the bins, with a copper spigot as the one bright accent
- Skill and time: Beginner to intermediate; one weekend
- Maintenance and safety: Captured roof water is for irrigation, not drinking, without proper treatment; rainwater rules vary by state, so check yours; clean the screen every few months; no meat or dairy in the compost
- Standout detail: A galvanized watering can hangs under the spigot on a hand-forged hook
Why this works: A 1,000-square-foot roof sheds about 600 gallons from one inch of rain, so even a single barrel captures water that would otherwise leave the yard.
Rain is free, and most roofs waste it. A 1,000-square-foot roof sheds roughly 600 gallons from a single inch of rainfall, so one barrel fills in minutes. My husband’s biggest warning is about mosquitoes: every opening needs fine mesh, including the overflow, because a barrel without screening breeds them within days. He also insists on a level block base, since a full barrel weighs about 460 pounds. Remember that roof runoff is irrigation water only, not drinking water, without proper treatment. Rules differ by state, and Texas permits rainwater collection, so confirm what applies where you live.
The compost side is chemistry you can see. A healthy pile needs roughly two or three parts dry browns, like shredded leaves, to one part wet greens, like kitchen scraps. Keep it as damp as a wrung-out sponge and turn it every week or two. Use heat-treated pallets stamped HT, never methyl bromide ones stamped MB. Louisiana iris and Gulf Coast muhly at the overflow soak up spills and bloom in lavender and pink. Keep meat and dairy out of the bin, and route overflow away from the foundation; see our Gutter Downspout Drainage guide.
13. Neighbor Harvest Swap Cabinet
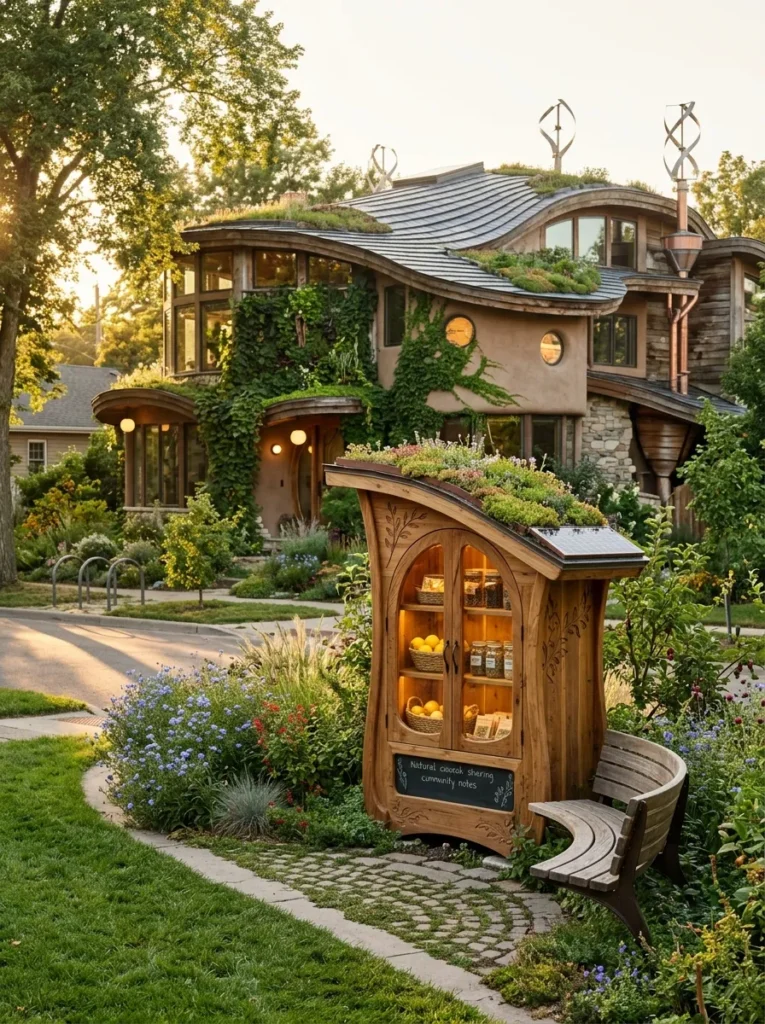
- Access level: Owner-Build
- The job: Brings neighbors together with a front-yard cabinet for trading extra produce, seeds, and tools
- The build and cost: Cedar cabinet 24 inches wide, 18 deep, and 48 tall on two 4×4 posts set in concrete, with a slanted metal roof and a hinged arched door with a clear acrylic window; about $300–$600
- Plants: Gregg’s mistflower (Conoclinium greggii) and ‘Furman’s Red’ autumn sage (Salvia greggii), full sun, roughly zones 7–9; both feed pollinators late in the season
- Design language: An arched door and a gently scalloped roof edge, so the cabinet reads like a garden gate
- Skill and time: Intermediate carpentry; one weekend
- Maintenance and safety: Check HOA and city rules on front-yard structures, keep it out of the public right-of-way, post a “whole produce and sealed items only” note, and check it weekly
- Standout detail: A chalkboard strip on the door lists what is in season this week
Why this works: A visible, easy place to leave and take things gives neighbors a low-pressure reason to meet, which builds the trust that shared resources depend on.
The most solarpunk thing on our street is not a solar panel. It is a cedar cabinet with a chalkboard strip, where someone leaves lemons, someone else leaves seed packets, and a handsaw appears whenever you need one. I’ve watched neighbors who had waved for years finally start talking over a bag of figs. Build it where people already walk, set back from the sidewalk so it stays out of the public right-of-way, and set the posts in concrete so wind and kids can’t tip it. A slanted metal roof sheds rain and keeps the contents dry.
The planting does the same work for pollinators. Gregg’s mistflower blooms in fall, right when monarch butterflies pass through Texas on their migration south, and autumn sage keeps blooming into cooler weather. Their timing is the plant science: a cabinet stocked with fruit invites neighbors, and flowers that bloom late stock the pantry for insects. Add a short bench beside it so people linger. Post a simple rule on the door, whole produce and sealed items only, and check it weekly so nothing spoils. Before you dig, confirm your HOA and city rules about front-yard structures.
14. Sun-Dried Laundry Arbor
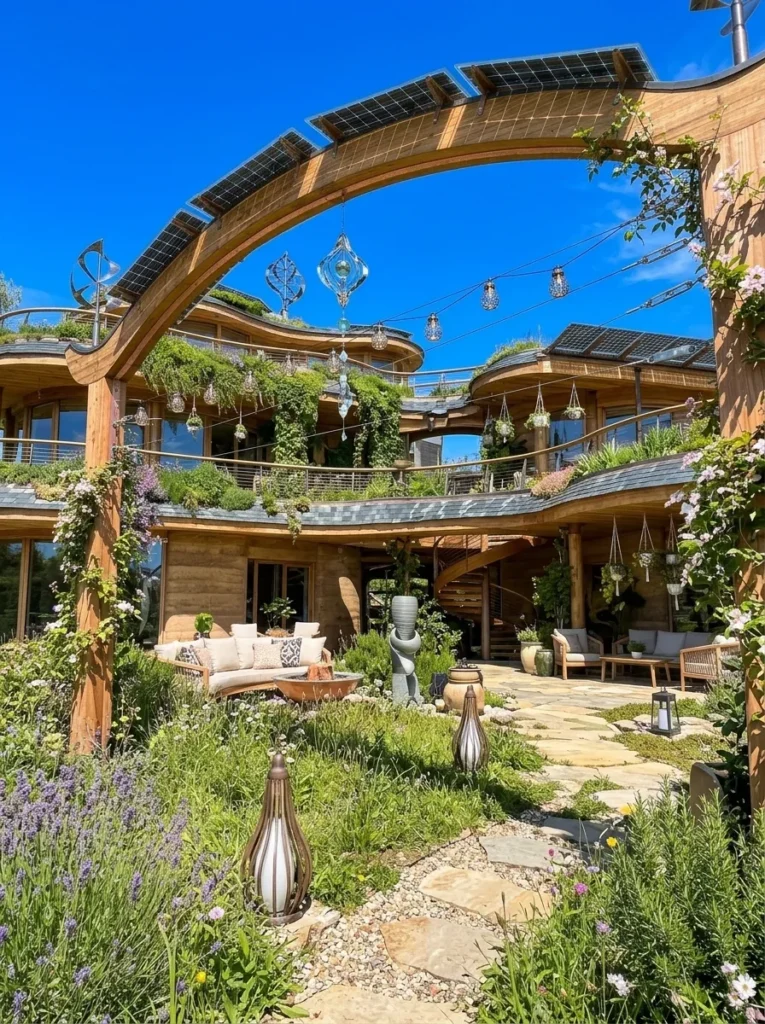
- Access level: Owner-Build
- The job: Dries a family’s laundry on sun and wind instead of electricity, and shades one edge of the yard
- The build and cost: Two 4×4 cedar posts 10 feet apart, 7 feet tall, set in concrete about 2 feet deep, with a curved cedar crossbeam and five lines of stainless cable tightened by turnbuckles; about $180–$350
- Plants: Rosemary and ‘Phenomenal’ lavender (Lavandula × intermedia) along the base, full sun, roughly zones 6–9; both need sharp drainage
- Design language: A bowed crossbeam that arcs like a drawn bow, so the line reads as a gate, not a utility fixture
- Skill and time: Beginner to intermediate; one weekend
- Maintenance and safety: Wipe the lines each season, check turnbuckles and footings, and keep lines well clear of power lines; some HOAs restrict clotheslines, and some states have right-to-dry laws, so check yours
- Standout detail: Pale linen sheets in a row turn the arbor into a glowing wall of light
Why this works: A clothesline dries laundry with free sun and wind, avoiding the electricity of one of the biggest appliances in many homes.
Few appliances use as much electricity as a clothes dryer, and a line costs almost nothing to run. Sun and wind dry laundry by evaporation, and ultraviolet light helps freshen fabrics, which is why sun-dried sheets smell clean. The structure matters more than it looks: two 4×4 cedar posts set in concrete about two feet deep, because a line loaded with wet towels pulls sideways with real force. Skimp on the footings and the posts lean within a season. Five lines of stainless cable, each tightened with a turnbuckle, hold a full family load without sagging.
I dry nearly everything outside from April through October, and the difference shows up in the electric bill and in the way sheets feel at night. Rosemary and Phenomenal lavender planted along the base brush your arm as you walk past, releasing aromatic oils from glandular hairs on their leaves. Both love full sun, need sharp drainage, and handle Austin summers. Pale linen sheets on the line turn the whole arbor into a glowing wall at golden hour. Check HOA rules first, since some restrict clotheslines, and look up whether your state has a right-to-dry law.
15. Spiral Native Bee Block
- Access level: Renter-Friendly
- The job: Gives native solitary bees a nesting site so they pollinate your squash, beans, and fruit
- The build and cost: Untreated cedar block about 4×4 inches and 6 inches long, drilled with 5/16-inch and 3/8-inch holes 4–5 inches deep (back left solid), mounted on a cedar backing board with a 6-inch roof overhang; about $25–$60
- Plants: Blackfoot daisy (Melampodium leucanthum) and prairie verbena (Glandularia bipinnatifida), full sun, roughly zones 5–9; both bloom steadily and handle heat
- Design language: A spiral of drilled tunnels on a rounded cedar slab, so it reads as sculpture
- Skill and time: Beginner; about one hour
- Maintenance and safety: Mount 3–6 feet up, facing southeast, fixed so it can’t swing; replace or clean nesting tubes yearly, since parasites and mold build up; avoid pesticides anywhere in the garden
- Standout detail: Nest holes sealed with green leaf discs and gray mud show you who has moved in
Why this works: Many native bees nest in tunnels, so a drilled block offers a nest site if it faces morning sun and stays dry.
My squash once flowered like crazy and set almost no fruit. I blamed the soil. The real problem was missing pollinators, and a plant scientist should have known better. Squash blossoms open for a single morning, and a female flower stays unfruitful until a bee delivers pollen. Many native bees, including mason and leafcutter species, nest in tunnels, so I mounted a cedar block with drilled holes beside the bed. Within weeks, small bees began sealing tunnels with mud and leaf pieces, and the zucchini finally set. Place it where it gets morning sun.
The build is small and forgiving. A finished block costs less than forty dollars. Drill 5/16-inch and 3/8-inch holes four to five inches deep into an untreated cedar block, leave the back solid, and spiral the holes in a pattern that looks more like sculpture than shelter. Hang it three to six feet high, facing southeast, under a small roof so rain stays out. Surround it with blackfoot daisy and prairie verbena for steady blooms. Clean or replace the nesting tubes yearly, because parasites and mold build up, and keep pesticides well away from the whole garden.
Styling Principles: The “Does a Job” Test
Run every element through one question. Before you buy, build, or plant anything, ask what job it does: shading, cooling, capturing water, growing food, generating energy, or bringing neighbors together. If the answer is “nothing yet,” it is decoration, and that’s fine, but it isn’t solarpunk.
Start with the hottest, wettest, or emptiest spot. The best first build solves a visible problem, like a west window that bakes every afternoon or a downspout that dumps water on the patio. Solarpunk house ideas work best when the problem picks the project, not the Pinterest board.
Match the plant to the season, not just the photo. Deciduous vines shade in summer and step aside in winter, while evergreens block winter sun you may want. Choose by what the plant does in January as well as in July.
Let curves signal intention. Arched rafters, scalloped edges, and bent-metal scrolls are what make a working structure read as solarpunk architecture instead of a utility fixture. One deliberate curve per build is enough.
Pay pros for the parts that fail badly. Roof loads, waterproofing, wiring, and permits belong to a structural engineer, roofer, or licensed electrician. Spend your own time on planting, finishing, and upkeep.
Start small, then stack. A cedar bee block under $60 or a trellis screen under $250 teaches you your sun, your soil, and your upkeep tolerance before you commit to a roof. Each small win makes the next build easier to decide.
Frequently Asked Questions About Solarpunk Home Design Ideas
What is solarpunk architecture? Solarpunk architecture is a design approach that treats every part of a building as a working system for shading, cooling, capturing water, growing food, generating energy, or connecting neighbors. It emerged online in the late 2000s and early 2010s as an optimistic alternative to cyberpunk, and it is usually recognized by curved, organic forms and heavy use of living plants.
Can I do solarpunk design in a rental? Yes. Freestanding projects like a hyacinth bean window screen, a quilted thermal curtain, a lemon and water-jar window nook, or a native bee block need no permanent changes. Choose pieces that move with you, and get your landlord’s approval before attaching anything to walls, railings, or siding.
Are green roofs practical for a typical home? They can be, but they are not a casual project. A saturated green roof is far heavier than shingles, so a structural engineer must confirm the framing, and the roof needs a proper waterproof membrane and root barrier. A small shed roof is the lowest-risk place to try one before considering a house.
Do I need permits for solar panels or rain barrels? For solar panels, nearly always. Expect building and electrical permits, a licensed electrician, and approval from your utility before connecting. Rain barrels are usually permit-free, but rainwater rules vary by state, and a few states, including Colorado, limit how much you can collect. Check your state and HOA, and remember that stored roof water is for irrigation, not drinking, without proper treatment.
What are the cheapest first steps? Start with a native bee block (about $25–$60), a clothesline arbor (about $180–$350), or a container trellis screen with hyacinth bean (about $140–$220). Each does one clear job, can be finished in a weekend, and costs far less than any roof or solar project.
Do I need to be experienced with plants or building? No. Most of the ideas here rated Beginner or Renter-Friendly need basic tools and a weekend. For the roof structure, solar wiring, and waterproofing, hire licensed professionals, and ask for quotes in writing so you know exactly who is responsible for what.
Keep Building
- Handle the water side of your yard with our Gutter Downspout Drainage Ideas guide before you add a rain barrel or rain garden.
- Grow your own harvest with our Fall Herb Garden guide once your first planter or keyhole bed is in.
Conclusion
A solarpunk home does not need a roof of panels. It needs one honest job done well, whether that is shade on a hot porch, a jar of water catching winter sun, or a cabinet that gets neighbors talking. I’ve seen how small builds like these can completely change how a house feels and performs. Use these solarpunk home design ideas as a menu, not a checklist: pick the one that solves your biggest problem and start this weekend.
Save the post on Pinterest so it’s waiting when you’re ready, and share it with the neighbor who’d happily trade figs for a plan.